 Pin it
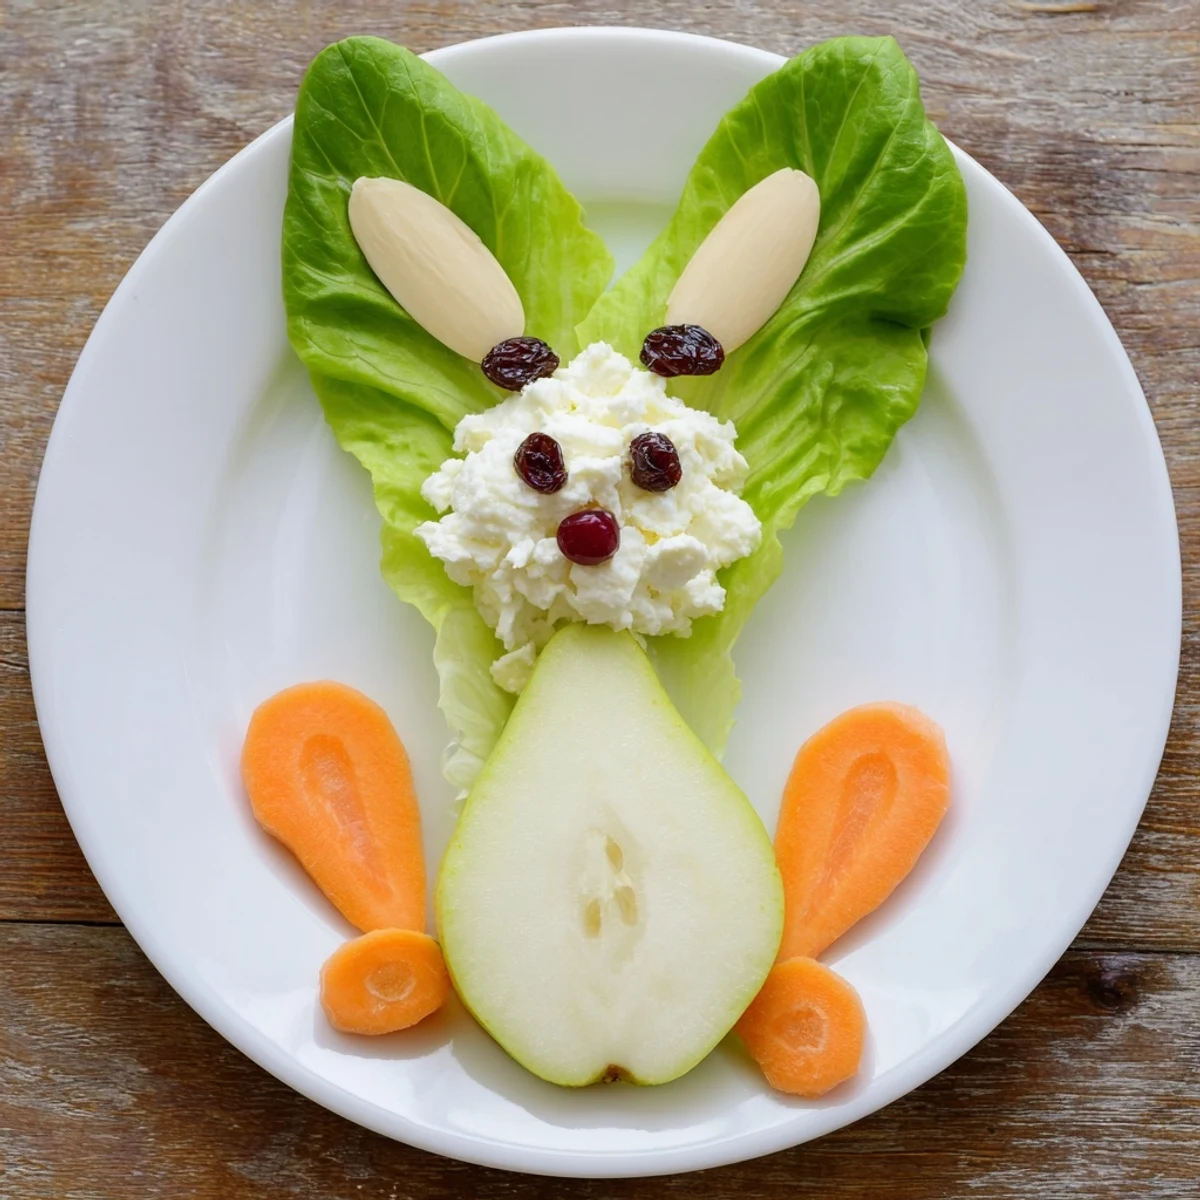
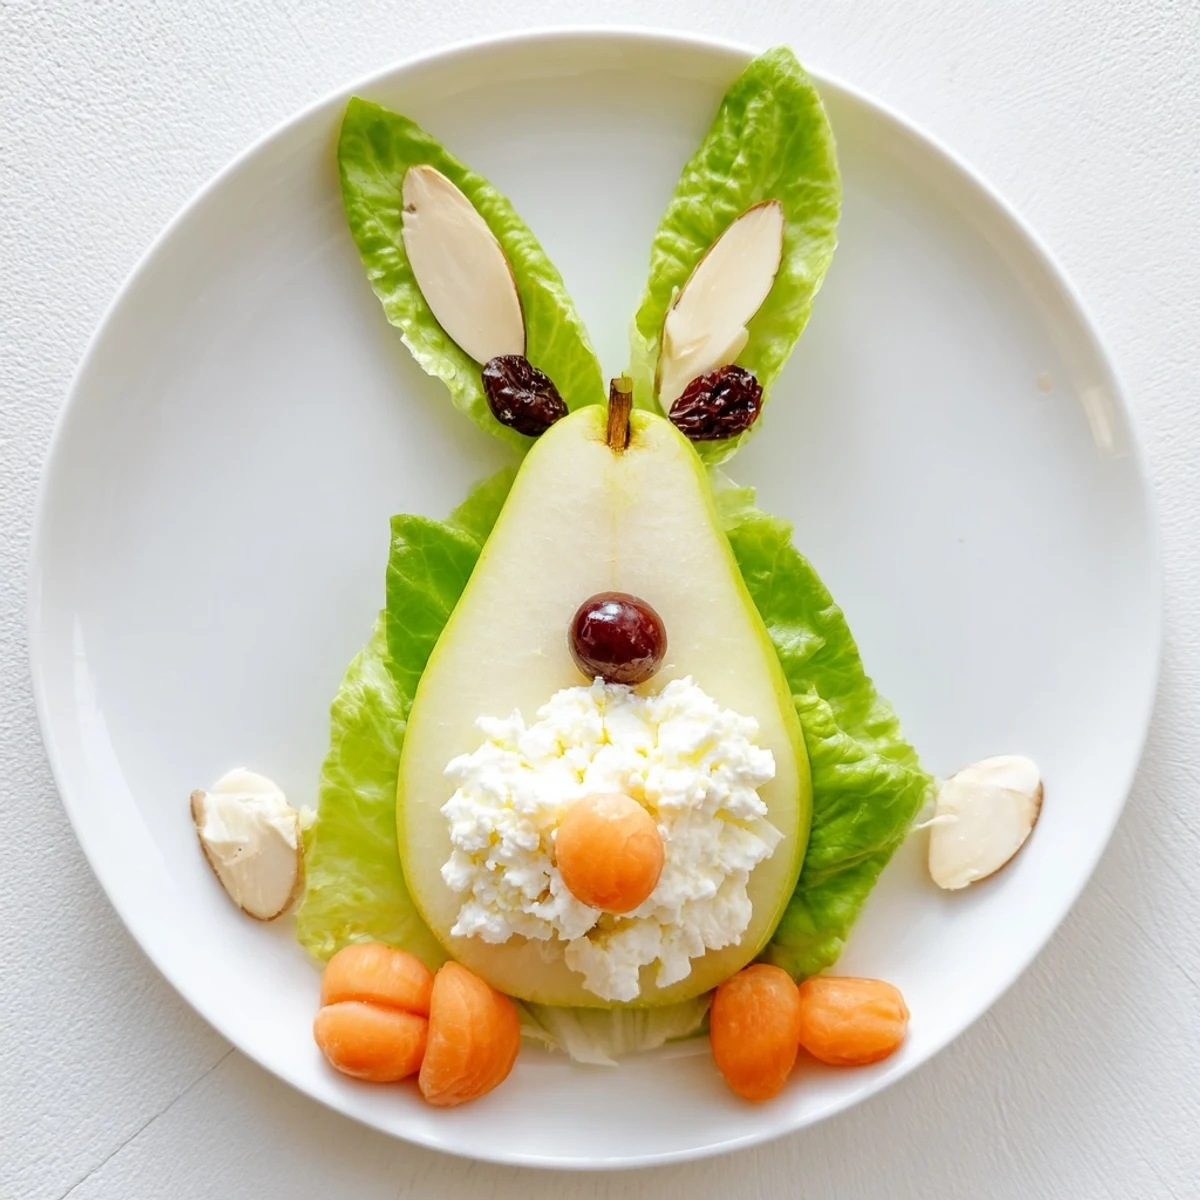
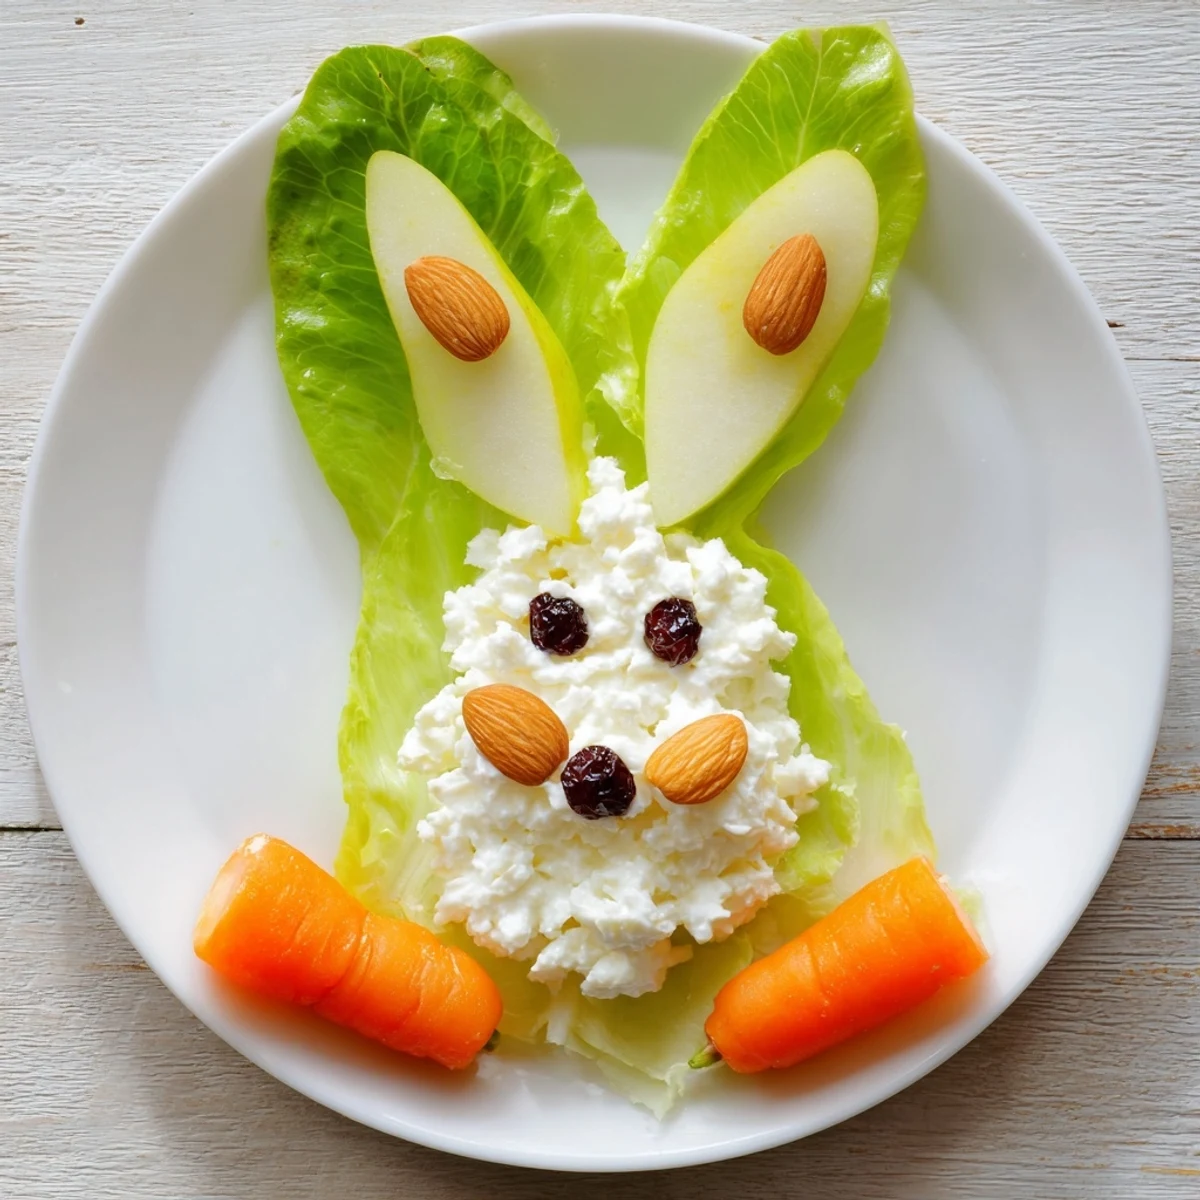
 Charming pears become adorable bunnies in this retro-inspired presentation. Ripe pear halves form the bodies, nestled on crisp lettuce leaves. Cottage cheese creates fluffy tails, while sliced almonds stand as perky ears. Carrot pieces craft tiny feet and whiskers, with raisins for eyes and cherries for noses. This whimsical arrangement brings joy to spring celebrations and children's gatherings. Ready in just 15 minutes, requiring no cooking—only simple assembly and artistic placement. Swap cottage cheese for whipped cream if preferred, or use mini marshmallows for extra playful tails.
I stumbled across this recipe in my grandmother's vintage cookbook collection last spring, when I was scrambling for something to bring to my niece's Easter gathering. The page was stained with what looked like pear juice, a testament to how many times she'd made these for my cousins. Now they're my go-to when I need to make children (and honestly, adults) giggle at the dinner table.
Last Easter, my skeptical teenage nephew ended up making three of these bunnies himself, carefully placing each almond ear with the precision of a surgeon. There's something about food with a face that brings out the playful side in everyone, even the too-cool-for-anything crowd.
Ingredients
- 2 ripe canned or poached pear halves: Canned pears work beautifully here because they hold their shape and have that perfect tender consistency that looks adorable as bunny bodies
- 4 large lettuce leaves: Use butter lettuce or romaine, something with enough surface area to create a nice grassy bed for each bunny
- 1 medium carrot: You'll need this for the tiny feet and whiskers, so pick one that's straight and wide enough to cut small shapes from
- 4 tbsp cottage cheese: This creates that fluffy cotton tail look, though the slight sweetness is actually a nice contrast to the pear
- 8 mini raisins or currants: These become the eyes, and their dark color gives each bunny so much personality
- 4 sliced almonds: The slightly curved shape of almond slices makes perfect upright ears that actually stay in place
- 4 maraschino cherries or red grapes: That pop of red for the nose is what really brings these bunnies to life
- 1 tbsp mayonnaise: Totally optional, but mixing a tiny bit into the cottage cheese makes for an extra fluffy tail
Instructions
- Prepare the bunny beds:
- Arrange those lettuce leaves on four small plates, thinking of them as little patches of grass where your bunnies will sit
- Position the pear bodies:
- Place each pear half cut side down on the lettuce, with the narrow end pointing toward you—that's where the face will go
- Create fluffy tails:
- Scoop a small mound of cottage cheese at the wider end of each pear, or mix in a touch of mayonnaise first for extra fluffiness
- Carve tiny features:
- Slice your carrot into thin rounds, then use your paring knife to cut little oval feet and delicate whisker shapes
- Add expressive ears:
- Gently press two sliced almonds into the top of each pear's narrow end, adjusting the angle until they look perky and alert
- Give them personality:
- Press two currants into the pear for eyes and add that cherry or grape nose right at the tip
- Final assembly:
- Position the carrot feet at the front and arrange the whiskers on either side of the nose, then serve right away before anything gets wilted
 Pin it
 My friend's three-year-old daughter named her bunny Mr. Whiskers and refused to eat him until everyone at the table had admired his nose first. There's something about these little pear creatures that turns mealtime into a moment of pure, simple joy.
Making These Your Own
I've swapped whipped cream for the cottage cheese when I wanted something sweeter, and it works surprisingly well as an extra-fluffy tail alternative. Fresh pears are lovely when they're in season, just poach them gently until they're tender enough to easily carve but still hold their shape.
Kid-Friendly Prep
Children absolutely love helping with these because there's no cooking involved, just creative assembly. I set up a little decorating station with bowls of each ingredient and let the kids place the eyes and noses themselves—they take such pride in their creations.
Serving Suggestions
These work beautifully as part of a spring brunch spread alongside quiche and fresh fruit, or as a light ending to an Easter meal. I've also served them as appetizers at baby showers where they were the conversation starter of the entire party.
- Make a small batch for each child to decorate as an activity at birthday parties
- Set up all the components buffet style and let guests build their own bunny
- Pair with a simple green salad if you're serving these as a starter rather than dessert
 Pin it
 There's something deeply satisfying about turning simple ingredients into something that makes people light up, and these pear bunnies never fail to bring a bit of whimsy to the table. Hope they hop their way into your heart too.
Recipe Q&A
- → Can I use fresh pears instead of canned?
-
Fresh pears work beautifully when poached until tender. Simply simmer whole pears in water or light syrup for 10-15 minutes until they yield slightly to gentle pressure. Cool completely before halving and assembling your bunnies.
- → How far in advance can I prepare these?
-
For best results, assemble these charming bunnies within 30 minutes of serving. The pears may oxidize slightly and the cottage cheese can become watery if left too long. Keep components prepped separately and arrange just before your gathering begins.
- → What can I use instead of cottage cheese?
-
Whipped cream makes a lovely sweeter alternative for the tails. For a savory version, try ricotta cheese or even Greek yogurt. Mini marshmallows offer a fun, kid-friendly twist that stays fluffy and white.
- → Are there nut-free options for the ears?
-
Substitute almond slices with slivers of crisp apple, pear skin, or even small lettuce leaves carved into ear shapes. White chocolate chips or coconut flakes also create adorable ear alternatives for nut-sensitive gatherings.
- → How do I prevent pears from turning brown?
-
Toss fresh pear halves in lemon juice immediately after cutting. This natural acid prevents oxidation and keeps your bunnies looking fresh and appealing. Canned pears already maintain their color without additional treatment.
- → Can I make this dairy-free?
-
Replace cottage cheese with coconut whipped cream or dairy-free cream cheese. Use dairy-free mayonnaise or omit entirely. The playful bunny appearance remains delightful while accommodating dietary restrictions.