 Pin it
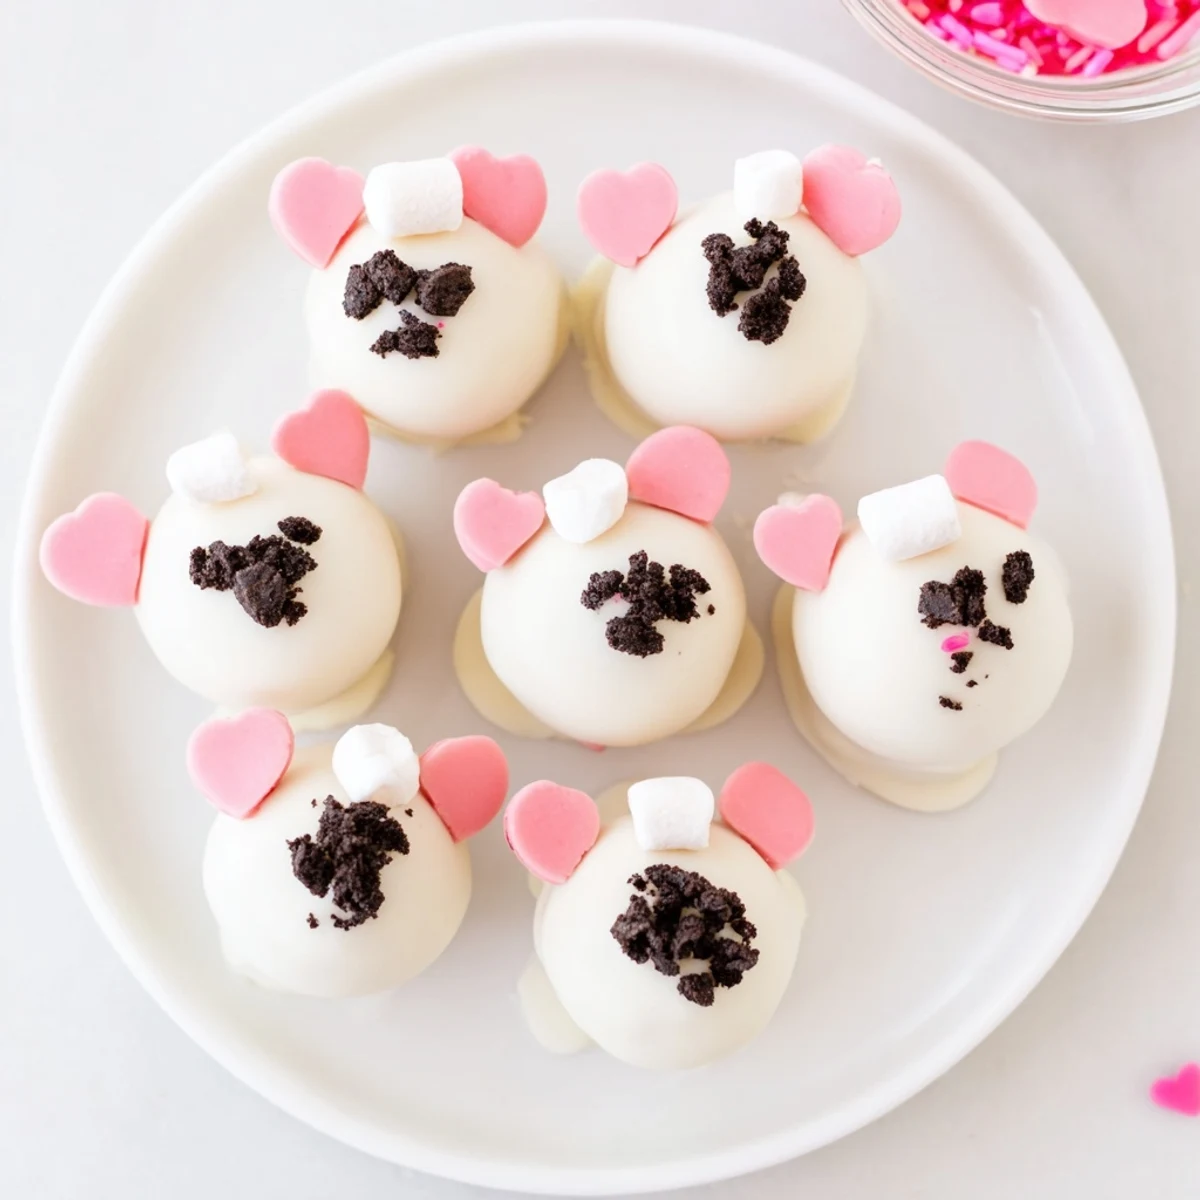
 These adorable bunny-shaped treats combine crushed Oreo cookies with cream cheese for a rich, creamy center, then dipped in smooth white chocolate. The finishing touch comes from cute marshmallow ears dusted with pink sugar, chocolate chip eyes, and heart sprinkle noses. Ready in under an hour with just 25 minutes of active preparation, these no-bake delights are perfect for spring gatherings, Easter baskets, or anytime you want a whimsical dessert that looks as charming as it tastes.
The kitchen counter was covered in pink sugar, marshmallow bits were stuck to my elbows, and I could not stop laughing at the tiny bunny faces staring back at me. My daughter had begged to make something cute for her class spring party, and what started as a simple Oreo ball experiment turned into the most adorable mess I had ever created. Those twenty-four little bunny balls disappeared faster than anything I have ever baked, and the best part was watching her friends argue over who got the one with the lopsided ears. Now they are requested for every spring gathering, and I have learned to keep extra marshmallows on hand because someone always eats the decorations before we finish.
Last year I made three batches in one weekend because I kept finding excuses to share them with everyone. My neighbor mentioned she was feeling down, so I dropped off a little box of bunny balls on her porch. She texted me an hour later saying they were the cutest thing anyone had ever given her and suddenly her teenage kids were asking if I could teach them how to make the ears stand up properly. There is something about food that looks like it is smiling at you that just makes everything better.
Ingredients
- 36 Oreo cookies: Regular Oreos work perfectly but double stuffed gives you an even creamier center that binds together beautifully
- 225 g cream cheese softened: Room temperature cream cheese blends seamlessly with the cookie crumbs creating that perfect truffle texture
- 400 g white chocolate or candy melts: White chocolate has a more complex flavor but candy melts set harder and create a smoother coating surface
- 48 mini marshmallows: Cutting these diagonally creates those adorable bunny ears that make these treats so recognizable
- Pink sanding sugar or edible pink gel: This gives the ears that sweet inner ear detail that makes the bunnies look finished and professional
- 48 mini chocolate chips or edible black marker: The eyes bring these little faces to life and chocolate chips add a nice crunch too
- 24 pink heart sprinkles or pink M&M minis: Heart sprinkles make the perfect tiny bunny noses but M&M minis work just as well
- 24 mini white marshmallows: These fluffy little tails are optional but honestly they complete the whole bunny personality
Instructions
- Prep your workspace:
- Line a baking sheet with parchment paper before you start because once those chocolate coated balls come out of the freezer, you need to move fast.
- Make the dough:
- Pulse the Oreos in a food processor until you have fine crumbs, then add the softened cream cheese and blend until it comes together into a thick dark dough that holds its shape when squeezed.
- Shape the balls:
- Scoop out tablespoon sized portions and roll them between your palms until smooth, placing each one on your prepared baking sheet with a little space between them.
- Chill thoroughly:
- Freeze the balls for 20 to 30 minutes because warm dough will melt your chocolate coating and create a sticky mess that nobody wants to deal with.
- Melt the coating:
- Microwave your white chocolate in 30 second intervals, stirring between each one, until it is completely smooth and fluid like heavy cream.
- Dip and coat:
- Drop a chilled ball into the chocolate, lift it with a fork, tap gently against the bowl edge to remove excess, and slide it back onto the parchment paper using a toothpick.
- Add bunny features:
- While the chocolate is still tacky, press two marshmallow ears into the top, add eyes and a nose, and position a tiny marshmallow tail on the back before everything sets.
- Final set:
- Refrigerate the completed bunnies for at least 30 minutes so the coating hardens completely and the decorations become secure.
 Pin it
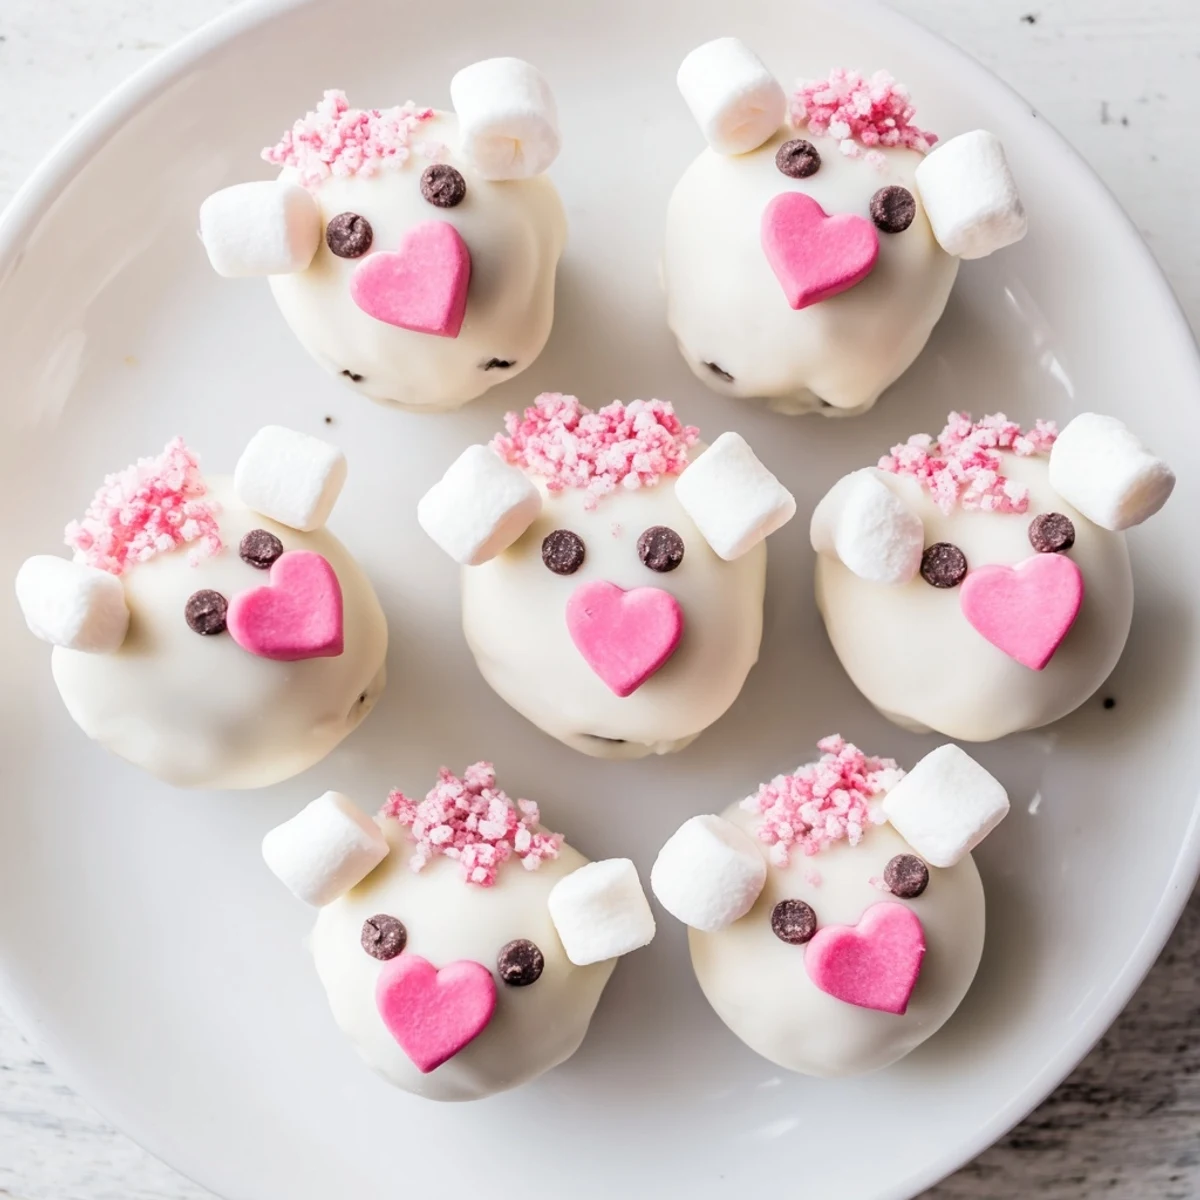
 My niece now requests these for her birthday instead of cake because she says regular cake cannot compete with something that has its own tiny fluffy tail. We have made them with different colored coatings for various holidays, but the spring white chocolate version with the pink details remains the family favorite. Last Easter my brother tried to sneak one before dinner and was caught with pink sugar all over his face, which is now a mandatory part of the story whenever we serve them.
Making The Perfect Ears
The secret to ears that stand up is cutting the mini marshmallows with a sharp knife that has been dipped in powdered sugar. This prevents the marshmallow from squishing down and keeps those clean diagonal lines that make the ears look perky instead of sad. I learned this after my first batch looked like they had been caught in a rainstorm, with ears flopping every which way and refusing to stay attached.
Coating Like A Pro
White chocolate can be temperamental and will seize if even a tiny drop of water gets into it, so make sure your bowl and utensils are completely dry before you start melting. I keep a separate dry spoon just for this purpose because I once ruined an entire batch by using a slightly wet spoon. Candy melts are more forgiving for beginners but real white chocolate has that velvety finish that makes these feel extra special.
Storage And Serving
These need to stay refrigerated until serving time because the cream cheese filling will soften at room temperature and the white chocolate coating can start to droop. I arrange them on a pretty platter right before guests arrive so they look their absolute best. They can be made up to three days ahead if stored in an airtight container in the refrigerator with layers of parchment paper between them.
- Let them sit at room temperature for 5 minutes before serving so the coating is not rock hard
- Package them in clear treat bags tied with pastel ribbons for adorable party favors
- Set up a decorating station and let guests create their own bunny faces as a fun activity
 Pin it
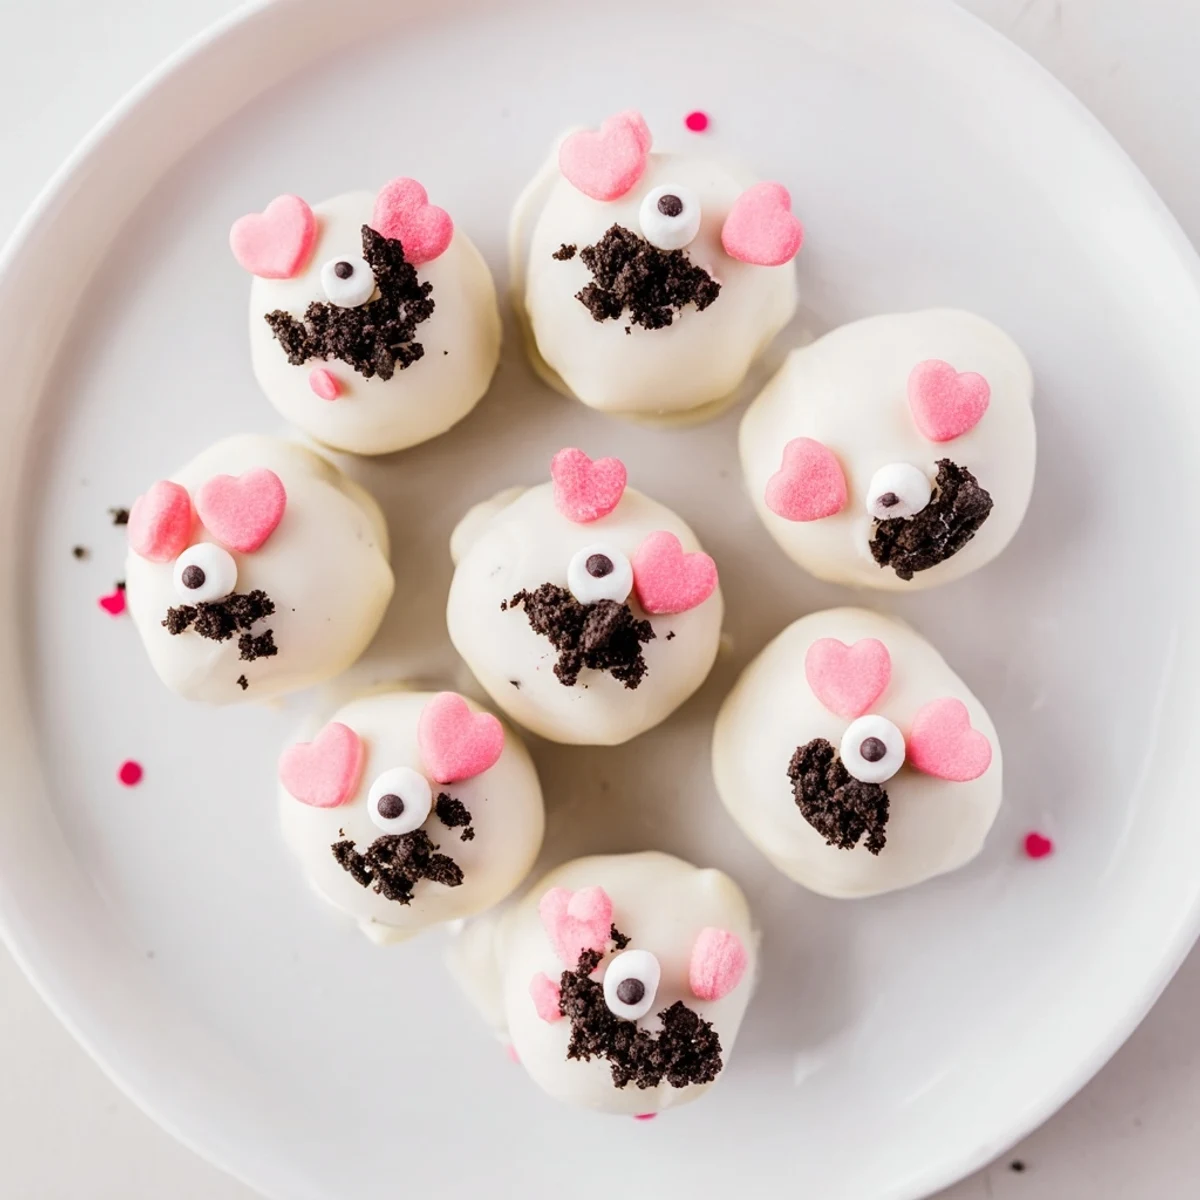
 There is something genuinely joyful about biting into these little bunnies and getting that perfect crunch of chocolate coating followed by the creamy Oreo center. They might be a bit fiddly to decorate, but seeing the delight on someones face when they realize the cute bunny is actually delicious makes every sticky finger worth it.
Recipe Q&A
- → How far in advance can I make bunny Oreo balls?
-
You can prepare these up to 2 days ahead. Store them in an airtight container in the refrigerator, separating layers with parchment paper to prevent sticking. The decorations stay fresh and the coating remains firm.
- → Can I freeze bunny Oreo balls for later?
-
Yes, freeze undecorated balls for up to 2 months. Thaw in the refrigerator overnight, then bring to room temperature before dipping in chocolate and adding decorations. Freezing decorated balls isn't recommended as the marshmallow ears may become soggy.
- → What if I don't have a food processor?
-
Place Oreos in a large ziplock bag and crush with a rolling pin or heavy mallet until finely ground. Alternatively, use a blender in short pulses. The texture should be fine crumbs, not large chunks.
- → Why do my balls fall apart when dipping?
-
This usually means they weren't chilled long enough. Freeze for at least 30 minutes until firm to the touch. Work quickly when dipping and avoid leaving them at room temperature for extended periods.
- → Can I use dark or milk chocolate instead?
-
Absolutely! Dark or milk chocolate work perfectly, though the white coating creates a better canvas for the bunny features. Colored candy melts in pastel shades also create beautiful spring variations.