Pin it
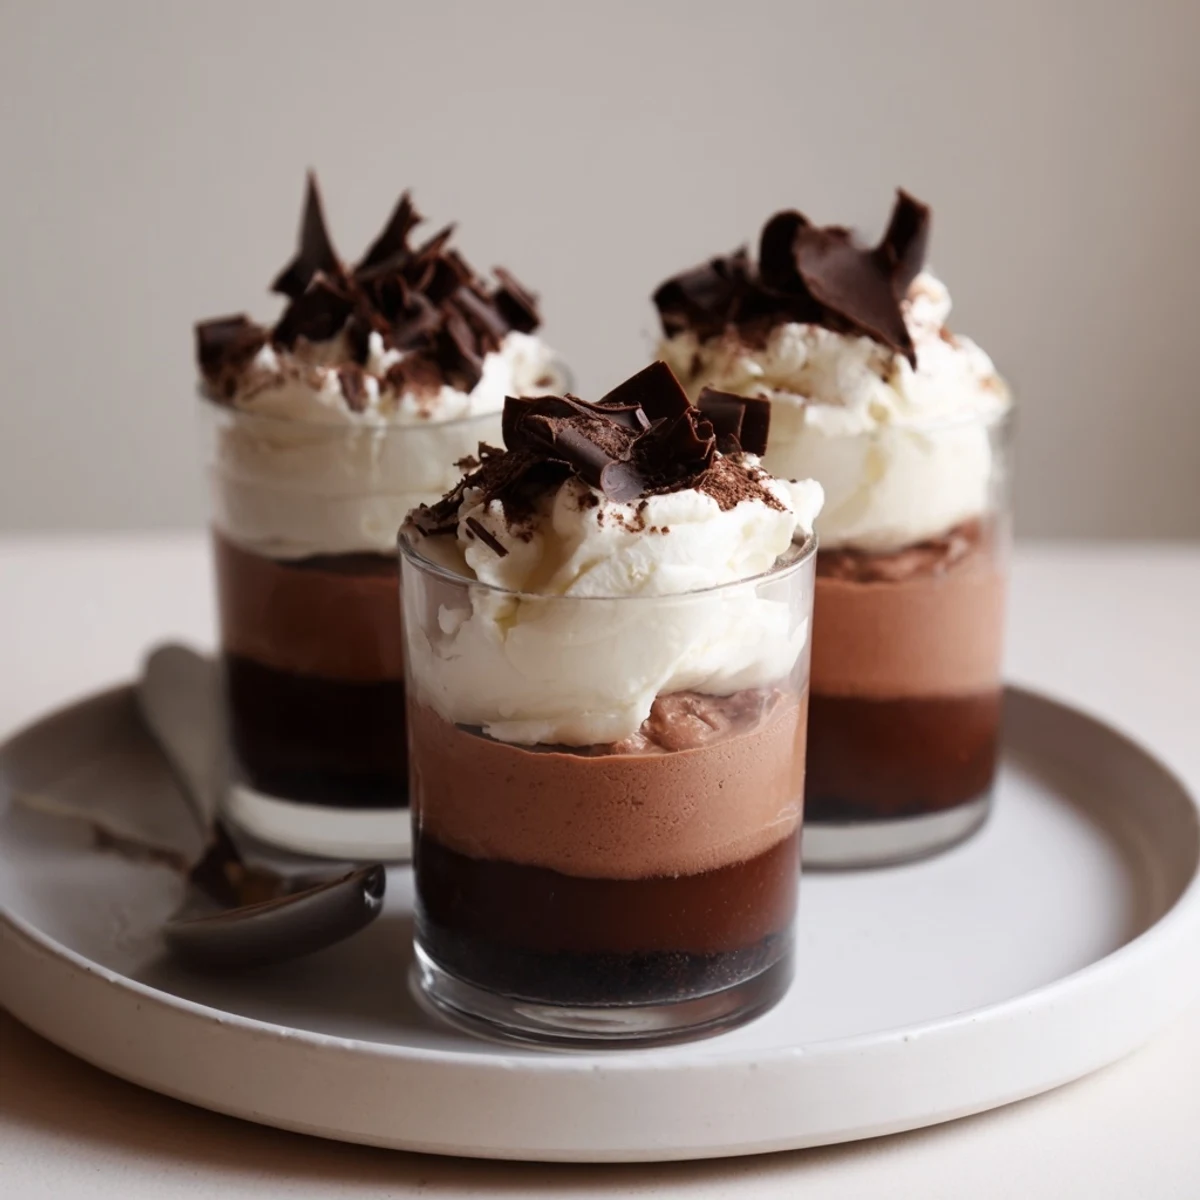
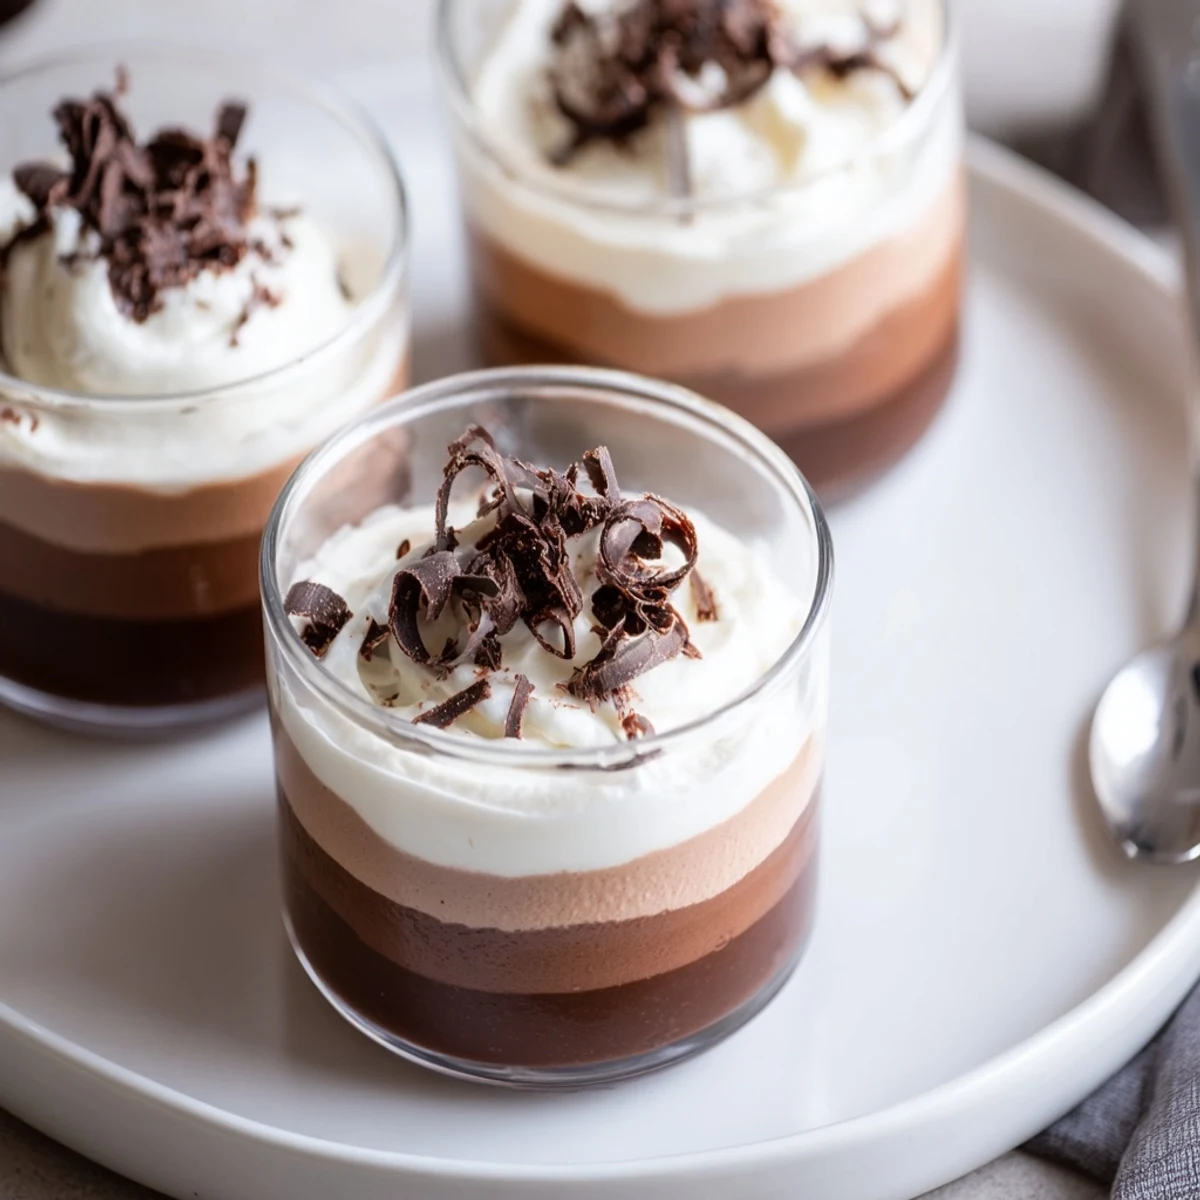
 These individual cups layer dark, milk and white chocolate mousses for a striking, indulgent finish. Each mousse is made by melting chocolate, whisking an egg yolk with sugar until pale, then folding in softly whipped cream to keep an airy texture. Assemble in cups or glasses, chilling between layers to set clean strata. Chill final cups at least an hour; garnish with shavings or cocoa. Use quality chocolate and add a splash of coffee liqueur to the dark layer for depth; freeze briefly between layers to speed setting.
There&aposs something almost theatrical about making triple chocolate mousse cups—that hush when the first layer smooths into the base, the sweet anticipation as each color stacks on top. One rainy Thursday, I decided to attempt these after spotting a trio of half-used chocolate bars lurking in the back of my pantry. The whiff of melted chocolate filled the kitchen, instantly shifting my mood. It felt less like following a recipe and more like building a tiny chocolate monument, just for the fun of it.
One evening, I brought out these mousse cups after a chaotic family dinner, expecting mild interest at best—but suddenly, all conversation stopped except for happy, surprised sighs as each person took their first bite. There was laughter as we debated our favorite layer (my brother claims the white chocolate is "the best surprise", but I&aposm sworn to the dark side).
Ingredients
- Dark chocolate (100 g, minimum 60% cocoa): Go for quality here—deep cocoa-rich flavor makes the base unforgettable.
- Milk chocolate (100 g): This mellows the richness, and using finely chopped bars helps with even melting.
- White chocolate (100 g): The sweetest note; be patient, as it melts quickly and can seize up fast.
- Egg yolks (3 total, one per mousse): These give that classic French mousse silkiness and a bit of structure.
- Sugar (1 ½ tbsp per layer): Just enough to bring out the chocolates&apost personalities without overwhelming them.
- Heavy cream (100 ml per layer, cold): Fresh from the fridge whips up best, so don&apost skimp on the chill.
- Shaved chocolate or cocoa powder (for garnish): It looks classy and gives a hint of texture in every bite.
Instructions
- Melt the dark chocolate:
- Break up the chocolate and melt it gently over a bain-marie or in the microwave, stirring until glossy and smooth.
- Mix the yolk and sugar:
- Whisk the egg yolk with sugar in a bowl until pale and creamy—when you lift the whisk, it should leave lazy ribbons.
- Combine chocolate and yolk:
- Gradually fold the melted chocolate into the egg mixture to keep everything light without streaks.
- Whip the cream:
- Using a chilled bowl, whip the cream until soft peaks form, then gently fold it into the chocolate mixture with a spatula.
- Layer and chill:
- Spoon the dark chocolate mousse into your cups as the base layer, then refrigerate while you start the milk chocolate mousse.
- Repeat for milk and white chocolate layers:
- Follow the same melting, mixing, and folding process for milk and white chocolate, gently smoothing each layer over the last, chilling briefly between each.
- Garnish and serve:
- Just before serving, sprinkle the tops with chocolate shavings or a veil of cocoa powder for a touch of elegance.
 Pin it
 There's a photo of my friend Sam pretending to "steal" the biggest mousse cup with a teaspoon, caught mid-heist, that makes me smile every time. Sometimes food turns casual evenings into memories you want to relive with every batch you make.
Perfecting Your Layers
Even layers look impressive but don&apost stress about perfection—small swirls and uneven drips add charm. I like using a piping bag for the final layer, squeezing slowly to avoid sinking the mousse underneath. If you&aposre short on time, pop the cups into the freezer between layers for a quick chill. Practice makes each cup a little easier.
Chocolate Choices and Shortcuts
Swapping out the chocolate types completely changes the flavor mood—hazelnut chocolate adds warmth, and orange-scented bars feel festive. One shortcut: melt all the chocolates at once but work fast so nothing seizes or overcools. Taste as you go; sometimes I add a pinch of espresso powder to the dark chocolate for depth, and nobody ever notices why it tastes so rich.
Serving and Storage Secrets
These mousse cups hold up beautifully in the fridge for up to two days, so you can prep ahead and pull them out right when needed. Small glass jars or espresso cups look elegant and give everyone their own little treasure.
- Keep mousse cups chilled until the last minute for best texture.
- If topping with shaved chocolate, add it just before serving so it stays crisp.
- Don't forget to hide one at the back of the fridge for yourself!
 Pin it
 Making these triple chocolate mousse cups always reminds me that a little extra effort brings a lot of joy. I hope your kitchen fills with the same sense of sweet possibility with every spoonful.
Recipe Q&A
- → How can I ensure light, airy mousse textures?
-
Whip cream to soft peaks and fold gently into the chocolate and sugar-whisked yolk to retain air. Use broad, slow strokes and stop as soon as the mixture is homogeneous to avoid deflating the mousse.
- → How do I prevent the chocolate from seizing when melting?
-
Melt slowly over a bain-marie or in short microwave bursts, stirring between intervals. Keep any contact with water to a minimum and remove from heat just before fully melted so residual warmth finishes the melt.
- → Can I prepare the cups ahead of time?
-
Yes. Assemble and chill the cups up to a day in advance, kept covered in the refrigerator to avoid condensation. Add delicate garnishes like shavings or cocoa powder just before serving for best appearance.
- → Are there safe egg alternatives for the yolks?
-
Use pasteurized egg yolks for safety, or replace yolks with a stabilized whipped cream base set with gelatin (or a vegan gelatin substitute) to mimic richness and structure while adjusting quantities for texture.
- → What chocolates work best for each layer?
-
Choose good-quality chocolate: 60%+ cocoa for the dark layer, classic milk chocolate for the middle layer, and a sweet white chocolate for the top to provide contrast and a creamy finish.
- → How long should I chill between layers for clean strata?
-
Chill 15–30 minutes between layers in the fridge to let each layer firm. For faster setting, place cups in the freezer for 25–30 minutes but monitor to avoid freezing the mousse solid.