 Pin it
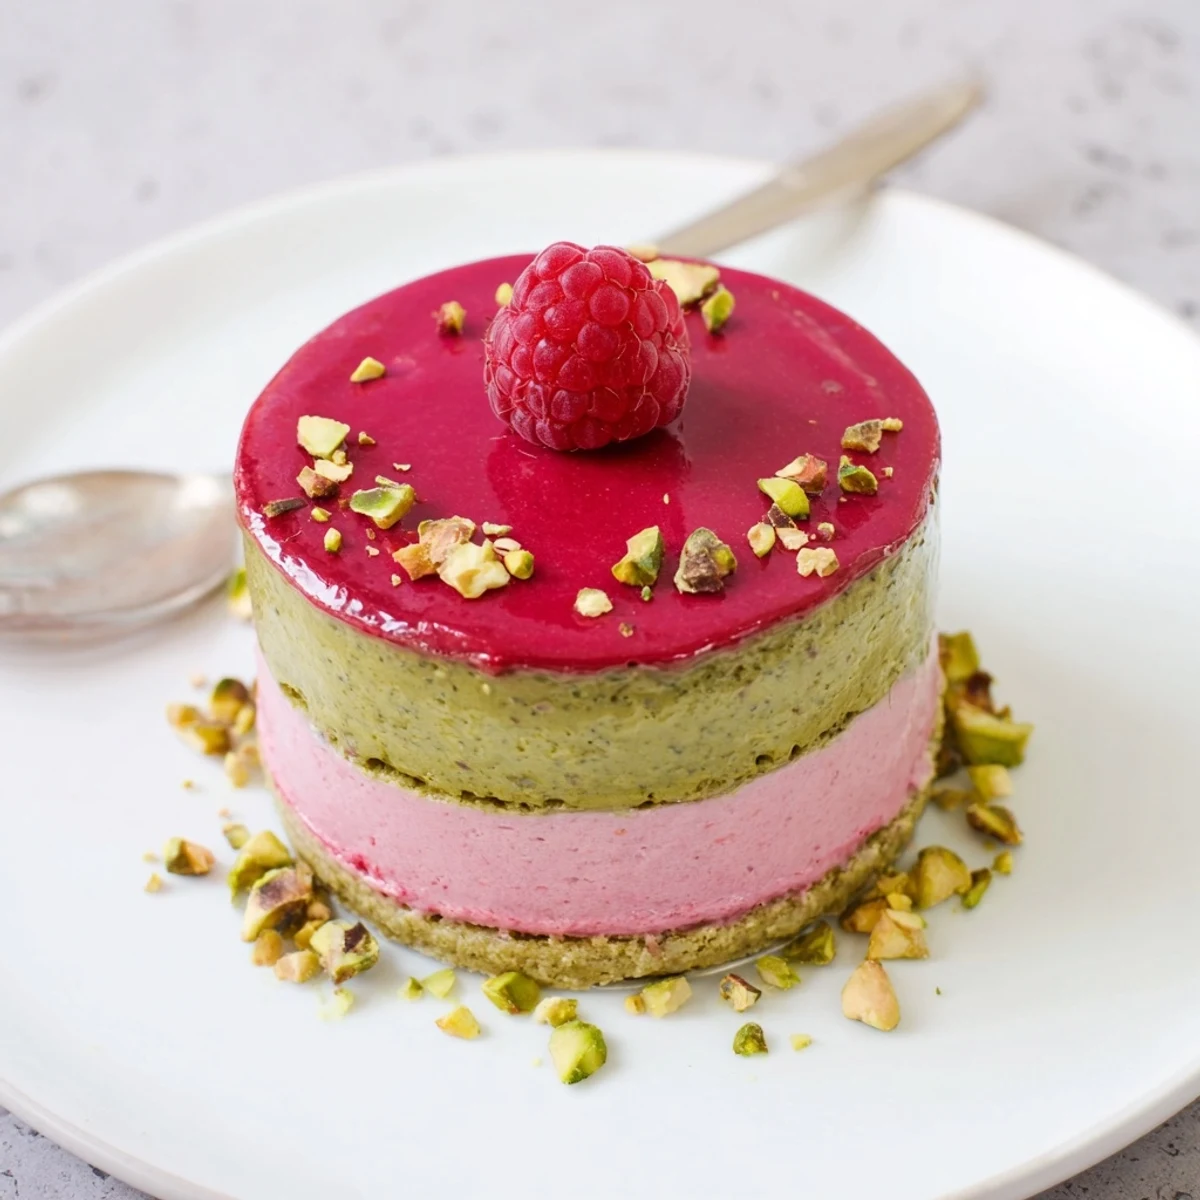
 These exquisite individual desserts combine three luxurious layers: a tender pistachio sponge base, silky pistachio mousse infused with premium pistachio paste, and bright raspberry mousse made from fresh fruit. Each mini cake is crowned with a gleaming raspberry mirror glaze that creates a stunning presentation. The preparation requires some patience and attention to detail, but the impressive results are well worth the effort for celebrations and elegant dinner parties.
The contrasting flavors and textures—nutty pistachio, tart-sweet raspberry, and airy mousses—create a sophisticated dessert experience. Best made ahead, these beauties need several hours of chilling time to set properly before glazing and serving.
The afternoon I first attempted these mini mousse cakes, my kitchen became a disaster zone of splattered raspberry purée and pistachio dust. I'd been dreaming of those elegant domed desserts you see in French patisserie windows, and somehow convinced myself they were within reach. My roommate walked in to find me hovering over the freezer, fingers crossed, wondering if three hours would be enough to set my ambitions. When I finally unmolded them the next morning, they were imperfect but stunningly beautiful, and we ate them standing up in the kitchen because plates felt like too much fuss.
I served these at my sister's bridal shower, arranged on a vintage cake stand I'd thrifted for three dollars. Everyone fell quiet when I brought them out, which felt like victory enough. Later, my aunt cornered me in the kitchen to demand the recipe, and I realized that's how you know you've made something worth remembering. They've become my go-to for celebrations, mostly because they make me feel like I know what I'm doing, even when I absolutely don't.
Ingredients
- 60 g finely ground pistachios: Freshly ground nuts release more aromatic oils, so pulse them yourself rather than buying pre-ground meal that may have sat on a shelf too long
- 40 g all-purpose flour: Provides structure to the delicate sponge without overwhelming the subtle pistachio flavor
- 2 large eggs: Room temperature eggs will achieve greater volume when beaten, creating a lighter sponge base
- 60 g granulated sugar: This amount balances sweetness without making the mousse cloyingly rich
- 30 g unsalted butter, melted: Add this last and fold gently to maintain the air you've worked so hard to incorporate
- 1/2 tsp baking powder: Just enough lift to ensure the sponge bounces back when touched
- Pinch of salt: Enhances the pistachio's natural sweetness and keeps the flavors from feeling flat
- 150 ml whole milk: Whole milk creates the richest base for the pistachio custard
- 100 g pistachio paste: This is where the real pistachio flavor lives, so invest in a quality brand or make your own by blending toasted nuts with a splash of oil
- 3 egg yolks: Save the whites for a meringue or breakfast the next day
- 45 g granulated sugar: Dissolved completely in the warm milk to prevent graininess in the finished mousse
- 3 sheets gelatin (6 g): Sheet gelatin dissolves more evenly than powder and produces a clearer set
- 200 ml heavy cream, whipped: Whip to soft peaks only, stiff peaks will make folding difficult and may cause the mousse to separate
- 200 g raspberries: Frozen work perfectly fine here, and actually release more juice when blended
- 60 g granulated sugar: Adjust based on berry sweetness, tart raspberries need the full amount
- 2 tbsp lemon juice: Brightens the raspberry flavor and helps cut through the rich creams
- 3 sheets gelatin (6 g): Bloom in cold water for at least 10 minutes before using
- 200 ml heavy cream, whipped: Same soft peak rule applies here
- 100 g raspberry purée: Strain thoroughly through a fine mesh sieve to catch all seeds, nothing ruins a glossy glaze like unexpected texture
- 50 g granulated sugar: This glaze needs to be slightly sweeter than you'd think, as sweetness diminishes when cold
- 2 sheets gelatin (4 g): Less gelatin here creates a glaze that sets but still yields beautifully when you bite into it
- 30 g chopped pistachios: Toast these lightly beforehand to wake up their flavor
- Fresh raspberries: Choose plump, deeply colored berries for the most striking contrast against the glossy glaze
Instructions
- Prepare your workspace and molds:
- Silicone dome molds work best for achieving that professional patisserie look, but ring molds on a lined sheet will create lovely straight-sided cakes. Make sure everything is clean and dry before beginning.
- Create the pistachio sponge:
- Beat those eggs and sugar until they've tripled in volume and fall from the whisk in a thick ribbon that holds its shape on the surface. Gently fold in the dry ingredients with a silicone spatula, then drizzle the melted butter down the side of the bowl and fold until just combined. Spread into an even layer on your prepared tray and bake until golden and springy. Let cool completely before cutting circles.
- Make the pistachio mousse base:
- Heat the milk and pistachio paste together until steaming, whisking until the paste fully dissolves. Whisk your yolks and sugar until pale, then temper them by slowly pouring in about a third of the hot milk while whisking constantly. Return everything to the pot and cook over low heat, stirring constantly, until the mixture coats the back of a spoon. Stir in the bloomed gelatin and cool to room temperature.
- Lighten the mousse:
- Fold a quarter of your whipped cream into the cooled pistachio base to lighten it, then gently fold in the remaining cream until no white streaks remain. Work quickly but gently to maintain the air you've incorporated.
- Prepare the raspberry mousse:
- Blend your berries with sugar and lemon until completely smooth, then push through a fine mesh sieve, pressing hard to extract all the juice. Warm a portion of the purée and dissolve the gelatin, then mix with the remaining purée and cool completely. Fold in the whipped cream using the same gentle technique as before.
- Begin assembly:
- Place sponge circles in the bottom of each mold. Pipe in the pistachio mousse, smooth the top, and refrigerate for 30 minutes until slightly set. This prevents the layers from mixing when you add the raspberry mousse on top. Smooth the final layer and freeze for at least 3 hours.
- Create the glossy glaze:
- Warm the raspberry purée and sugar just enough to dissolve, then stir in the gelatin until completely melted. Cool until it thickens slightly but still pours easily, about 70°F if you have a thermometer. Test it by pouring a spoonful over a frozen cake, it should coat evenly without dripping off the sides.
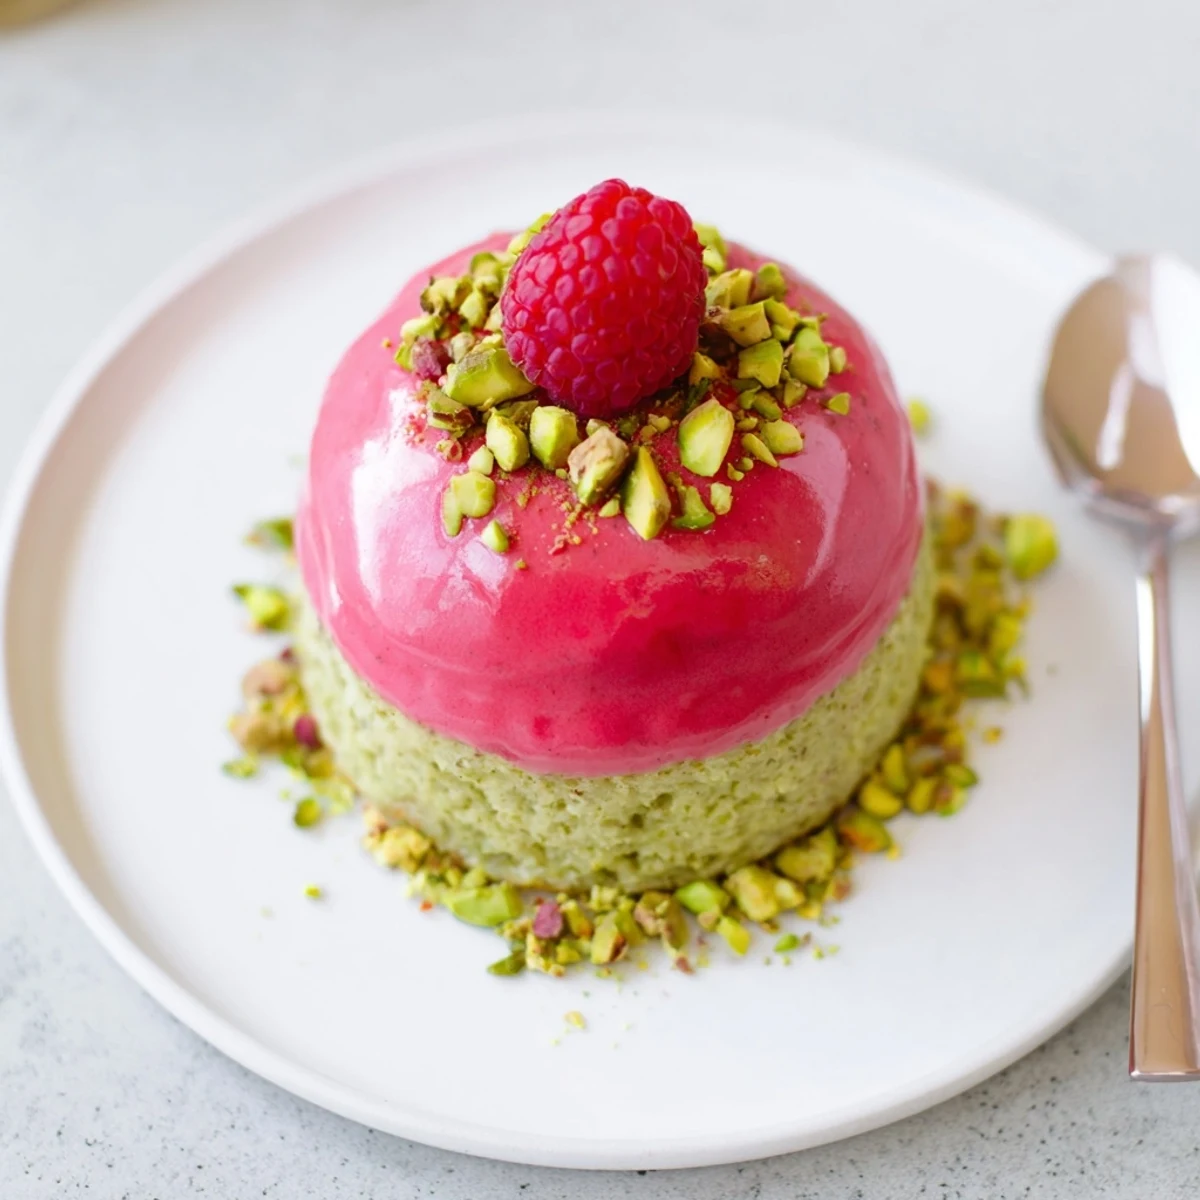
- Glaze and finish:
- Unmold your frozen cakes onto a wire rack set over a sheet pan to catch drips. Pour the glaze over each one in a quick, confident motion, starting from the center and working outward. Let set for a few minutes, then transfer to the refrigerator for 2 hours to thaw completely.
- Add the final touches:
- Just before serving, press chopped pistachios onto the bottom edge or sprinkle across the top. Top with fresh raspberries and serve immediately.
 Pin it
 These became my signature dessert during dinner party season, the thing friends started requesting before they even RSVP'd. I've learned to make them in batches and keep a stash in the freezer, which means I'm always prepared for celebrations both planned and unexpected. Something about those tiny layered cakes feels like a gift, even when you're giving them to yourself on a Tuesday night.
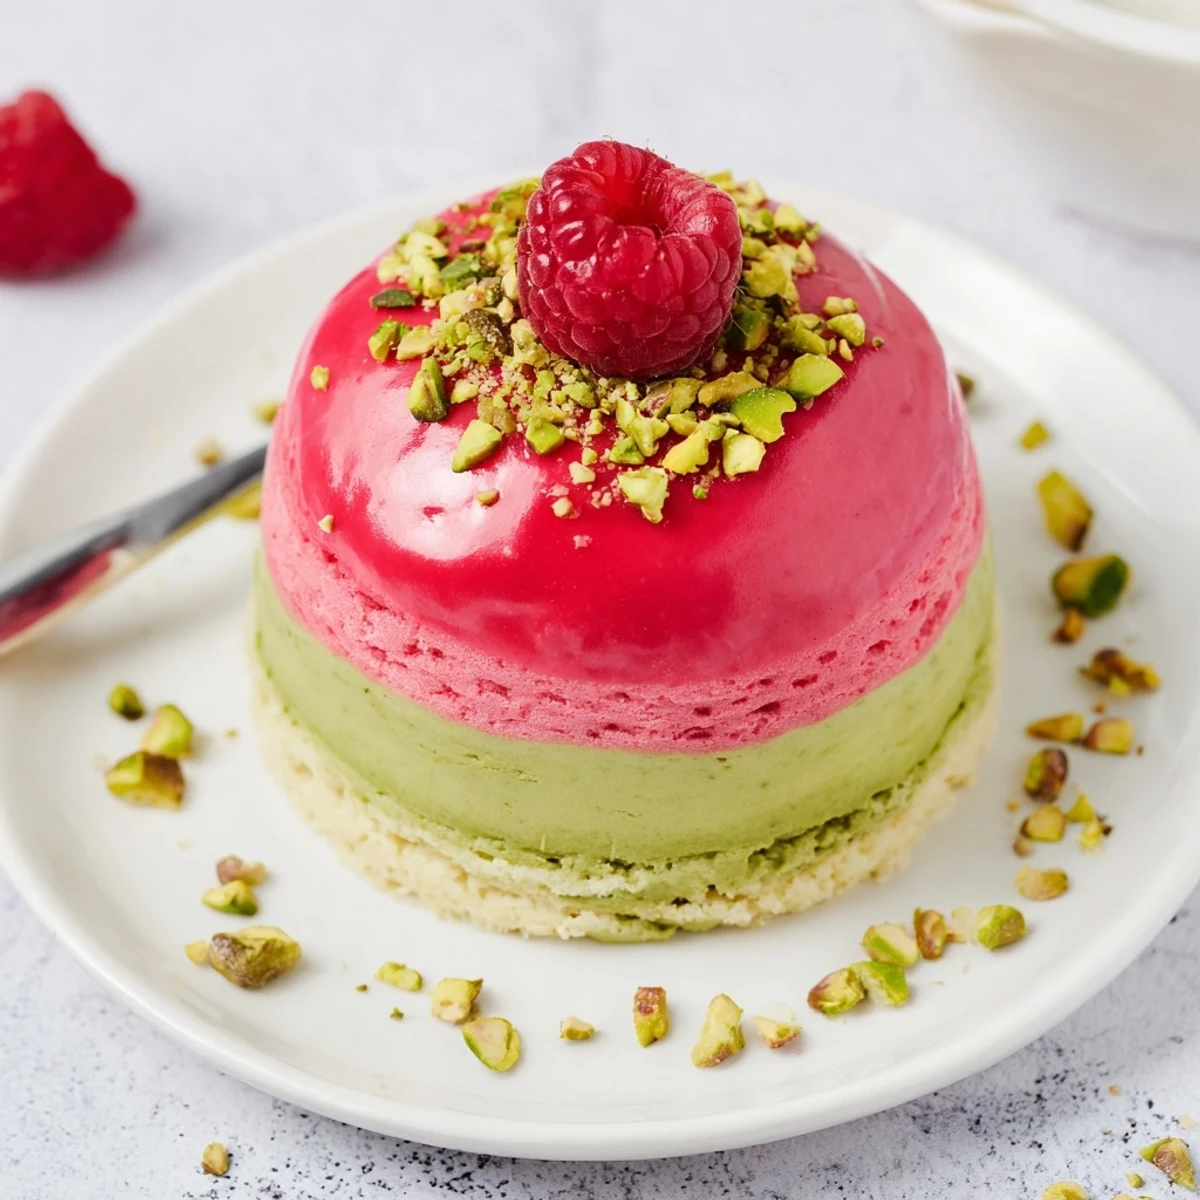
Getting That Perfect Dome
Silicone molds are your friend here, they release cleanly and maintain that beautiful curved shape. If you're using ring molds, line them with acetate strips for the smoothest sides and easiest removal. Tap the molds gently on the counter after filling each layer to release any air bubbles that could mar the surface.
Making Them In Advance
These freeze beautifully for up to two weeks, which means you can make them well before an event. Simply wrap each unmolded cake in plastic wrap after freezing, then glaze them the day you plan to serve. The glaze actually benefits from sitting overnight, becoming more mirror-like as it settles.
Troubleshooting Like A Pro
If your mousse doesn't set properly, it's usually because the gelatin wasn't fully dissolved or the base was too hot when you folded in the cream. A grainy texture means the pistachio custard was overcooked, so watch carefully and remove from heat the moment it thickens slightly. For glaze that's too thick, gently rewarm and add a teaspoon of water, too thin and you'll need to chill briefly before trying again.
- Always strain your custard through a fine mesh sieve before folding in cream
- Room temperature ingredients fold together most smoothly
- Work in a cool kitchen, heat is the enemy of mousse setting properly
 Pin it
 The first time these came out perfectly, I called my mother immediately just to tell her I'd finally made something that looked like it belonged in a magazine. She asked for the recipe too.
Recipe Q&A
- → How far in advance can these be prepared?
-
You can prepare these cakes up to 2 days before serving. Complete assembly and freezing steps, then glaze and thaw in the refrigerator 2-3 hours before your event. Garnish with fresh elements just before serving.
- → Can I use frozen raspberries for the mousse and glaze?
-
Absolutely. Frozen raspberries work perfectly for both the mousse and glaze. Thaw them before puréeing and strain well to remove seeds. The flavor remains excellent, making this budget-friendly option ideal.
- → What if I can't find pistachio paste?
-
You can make pistachio paste by blending shelled pistachios with a small amount of neutral oil until smooth. Alternatively, substitute with almond paste for a different but equally delicious flavor profile.
- → Why must the cakes be frozen before glazing?
-
Freezing firms the mousses completely, ensuring they hold their shape during unmolding and glazing. The frozen surface also helps the glaze set quickly and evenly, creating that professional mirror finish.
- → Can I make these without ring molds?
-
Yes. Silicone dome molds work beautifully. You can also use small ramekins or even a muffin tin lined with plastic wrap for a rustic look. Adjust size and baking time accordingly.