 Pin it
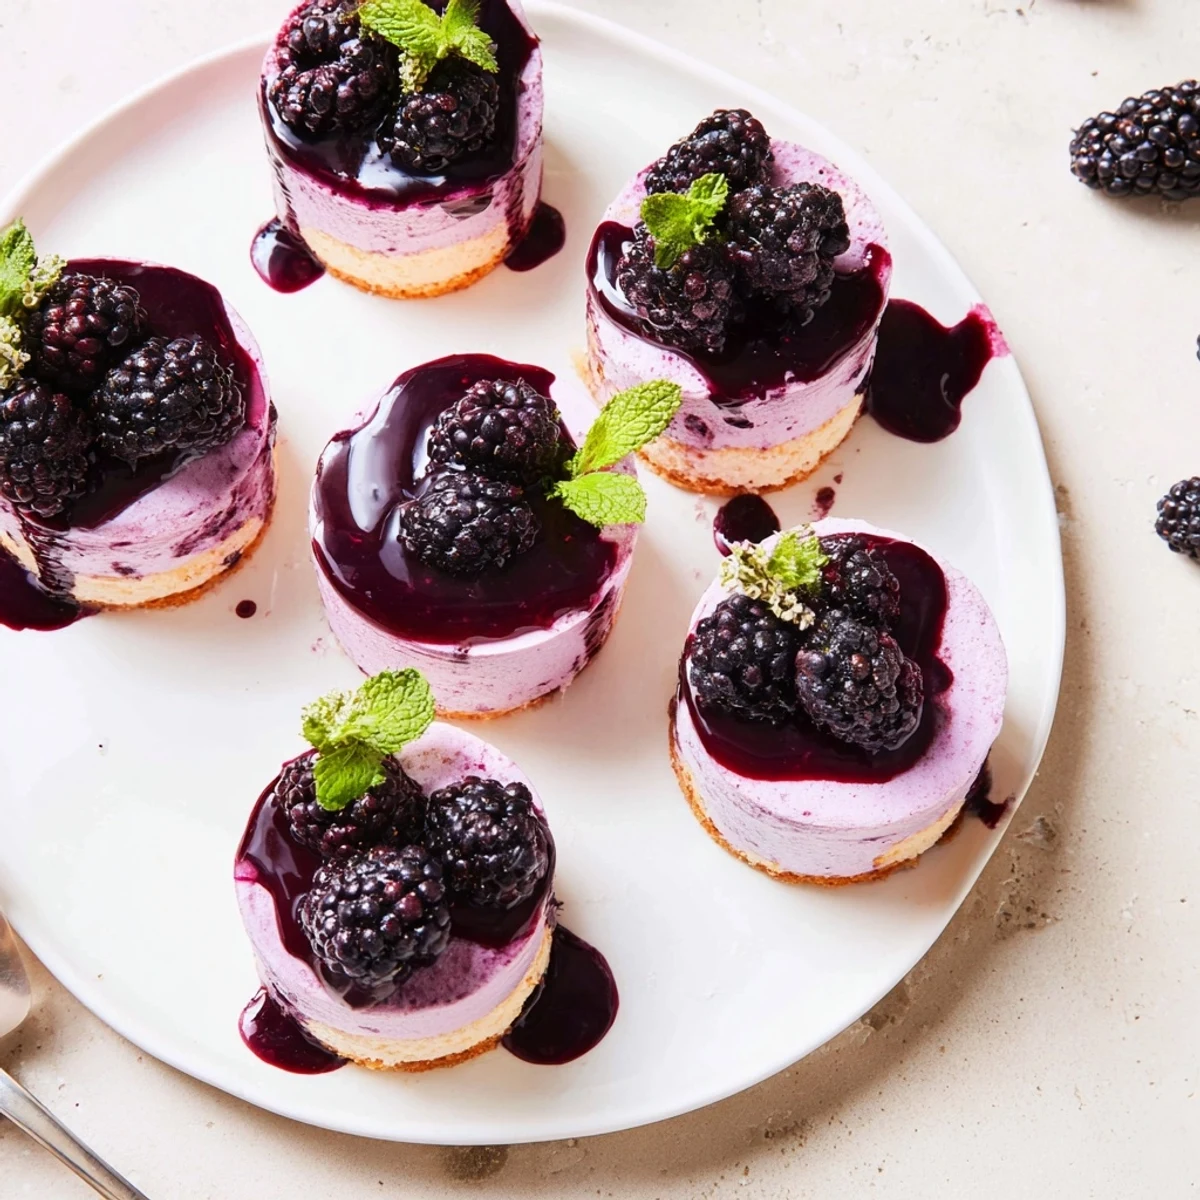
 These elegant individual desserts combine three luxurious layers: a tender vanilla sponge base, an incredibly light and airy blackberry mousse infused with fresh berry puree, and a mirror-like glossy blackberry glaze that creates stunning presentation. The mousse achieves its delicate texture through perfectly whipped heavy cream folded into a fruit-forward gelatin mixture, while the sponge provides essential structural support. Each component can be prepared ahead, making these ideal for entertaining. The result is a sophisticated dessert that balances sweetness with the natural tartness of fresh blackberries, creating a memorable finale to any meal.
The summer my neighbor invited me over for an afternoon of petits fours, I watched her transform simple berries into these elegant little towers. She didnt measure anything, just worked by feel and instinct, and the results were stunning. I came home and spent weeks trying to capture that same airy lightness, accidentally eating more failures than I care to admit. Now these tiny mousse cakes are my go-to when I need something that looks far more impressive than the effort actually requires.
Last summer I made these for my sisters birthday dinner, setting them out on the patio as the sun went down. Everyone fell silent for a moment when I brought out the platter, and honestly, that glossy purple shine catching the last light was worth all the chilling time. My brother-in-law asked if Id opened a bakery, which might have been an exaggeration, but Ill take it.
Ingredients
- 2 large eggs: Room temperature eggs whip up much faster and hold air better, so take them out about thirty minutes before you start
- 60 g granulated sugar: This might seem like a small amount for the sponge, but we want just enough sweetness to support the mousse without overpowering those delicate blackberry notes
- 60 g all-purpose flour: Sift it first to avoid any lumps that would mar the tender crumb were after
- 1/4 tsp vanilla extract: Pure extract makes a difference here since the sponge is so simple
- Pinch of salt: Just enough to wake up the flavors without being detectable
- 300 g fresh or frozen blackberries: Frozen work perfectly fine here, and sometimes theyre actually more flavorful since theyre picked at peak ripeness
- 80 g granulated sugar: Adjust this slightly depending on how sweet your berries are, but dont reduce it too much or the mousse wont set properly
- 2 tbsp lemon juice: Brightens the blackberry flavor and helps balance all that cream
- 6 g (2 sheets) powdered gelatin or leaf gelatin: Sheet gelatin gives a slightly silkier texture, but powder works beautifully if you bloom it properly
- 250 ml heavy cream, cold: The colder the better, and chill your bowl too for the fastest, most stable whipping
- 100 g blackberry puree: Strain this twice for the smoothest glaze possible
- 30 g granulated sugar: Just enough to make the glaze glossy and spreadable without becoming too sweet
- 2 g (1 sheet) gelatin: This small amount keeps the glaze from sliding right off the mousse
Instructions
- Bake the sponge foundation:
- Preheat your oven to 350°F (175°C) and line a 9x13-inch baking sheet with parchment, letting it overhang the sides slightly. Beat those room temperature eggs and sugar until theyre pale and dramatically increased in volume, about five full minutes with an electric mixer. Gently fold in the sifted flour, vanilla, and salt, being careful not to deflate all those air bubbles you just worked so hard to create. Spread the batter evenly and bake for 10 to 12 minutes until the surface springs back when lightly touched. Let it cool completely before cutting out eight circles with a 2.5-inch cookie cutter, then place each circle in the bottom of your silicone molds.
- Craft the blackberry mousse:
- Softening your gelatin in cold water for about five minutes while you simmer the blackberries, sugar, and lemon juice until the berries completely collapse. Press the mixture through a fine sieve, discard the seeds, and stir the softened gelatin into the warm puree until it disappears completely. Let it cool to room temperature while you whip your cold cream to soft peaks, then gently fold the blackberry mixture into the cream until no streaks remain. Spoon this cloudslike mousse over each sponge base and chill for at least four hours until firm.
- Finish with the glaze:
- Bloom your remaining gelatin while warming the blackberry puree and sugar just until the sugar dissolves. Stir in the gelatin until completely smooth, then let it cool until its slightly thickened but still pours easily. Unmold your chilled cakes onto a rack over a tray and pour the glaze over each one, letting it cascade down the sides. Give them another quick chill to set, then garnish with fresh berries or flowers if youre feeling fancy.
 Pin it
 My friend Anna came over once while I was in the middle of glazing these, and we ended up standing in the kitchen eating the reject cakes, the ones where the glaze had dripped unevenly or the sponge had crumbled slightly. Those messy ones tasted just as wonderful as the perfect ones, maybe better because we were laughing and eating them standing up with purple stained fingers.
Making These Ahead
You can prepare the sponge circles a day in advance and store them in an airtight container. The mousse cakes themselves can be completed and chilled up to two days before serving, but wait to glaze them until the day youre serving. That glossy finish is best within 24 hours before it starts to lose its perfect shine.
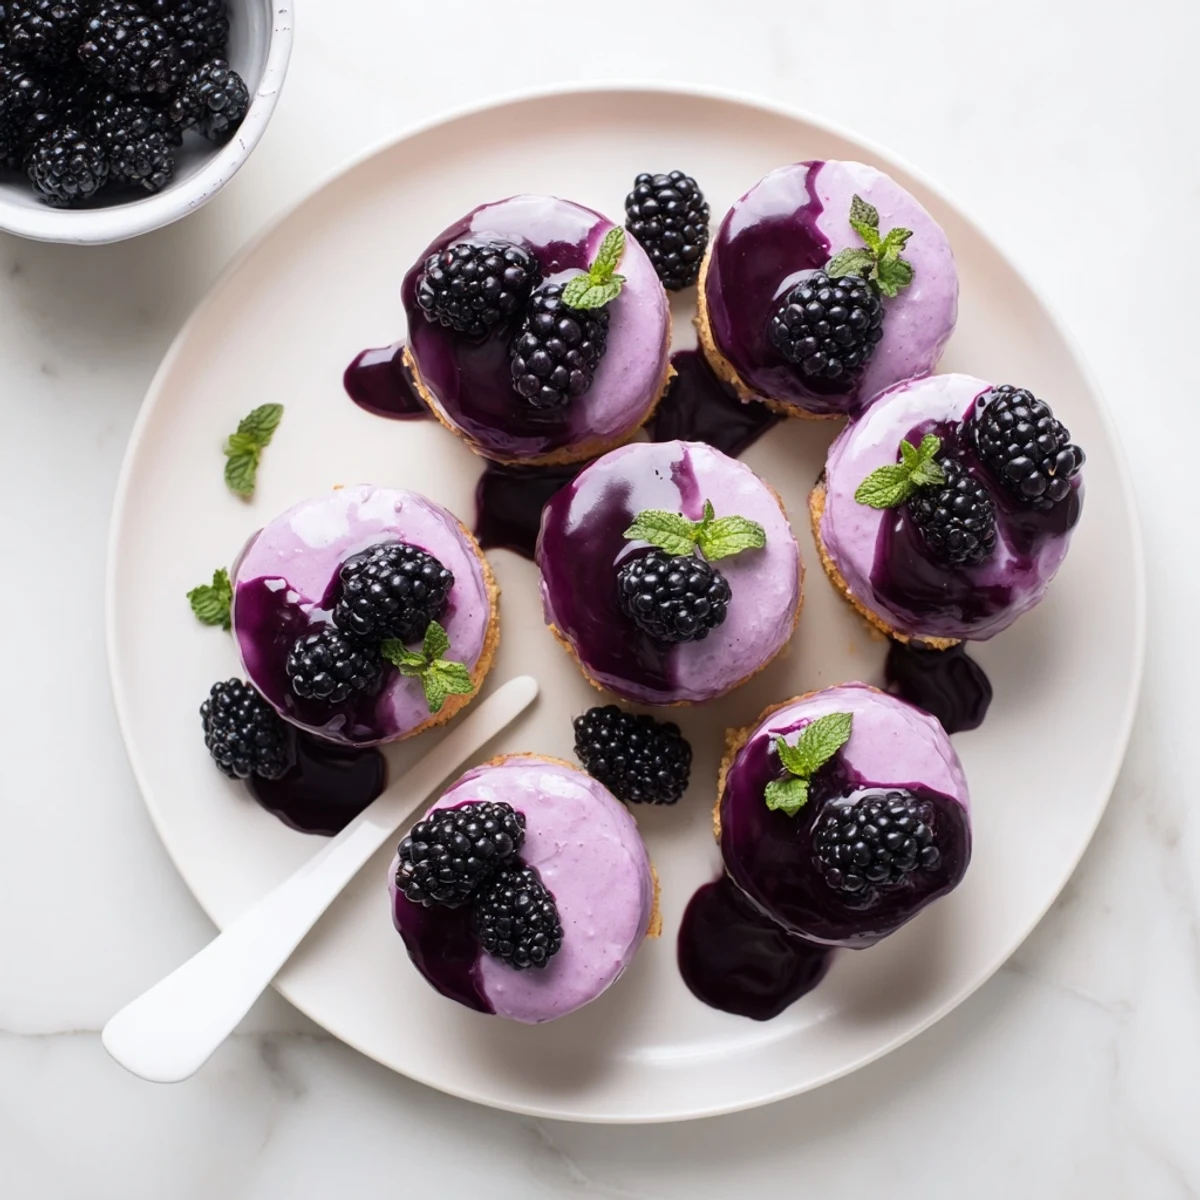
Getting That Mirror Finish
The glaze temperature is everything here, too warm and it slides right off, too cool and it looks patchy and uneven. I dip a spoon in to test, it should coat the back of the spoon and hold its shape without running off. Place your chilled cakes on a wire rack set over a baking sheet to catch the drips, then pour in one confident motion starting from the center and letting it find its own way down the sides.
Serving Suggestions
These need to come straight from the refrigerator to the table, as the mousse softens quickly at room temperature. Small plates and tiny forks make them feel even more special, though Ive also served them in paper cups at casual picnics and they still felt elegant.
- Let them sit at room temperature for exactly five minutes before serving, this softens the mousse just enough for the silkiest texture
- Pair with something bubbly and slightly sweet to echo the berries
- Always serve them cold, room temperature mousse loses its magic completely
 Pin it
 Theres something deeply satisfying about serving a dessert that looks this sophisticated and knowing it came from your own kitchen. These little cakes have a way of making ordinary moments feel like celebrations.
Recipe Q&A
- → Can I use frozen blackberries instead of fresh?
-
Yes, frozen blackberries work perfectly in both the mousse and glaze. Thaw them completely before cooking, and expect to release slightly more liquid during the simmering process. The flavor and color remain excellent, making these accessible year-round regardless of fresh berry availability.
- → How far in advance can I make these mini cakes?
-
You can prepare the sponge bases up to 2 days ahead and store them in an airtight container. The assembled mousse cakes need at least 4 hours to set but can be refrigerated for up to 2 days before glazing. Add the glossy glaze and garnishes within 4-6 hours of serving for optimal appearance and texture.
- → What can I substitute for gelatin to make these vegetarian?
-
Use agar-agar powder as a vegetarian alternative to gelatin. For the mousse, substitute with 4g agar-agar powder, and use 1.5g for the glaze. Note that agar-agar sets more firmly than gelatin, so the texture will be slightly different but still delicious. Always follow the package instructions for proper blooming and activation.
- → Why did my mousse turn out dense instead of airy?
-
Dense mousse usually results from over-whipping the cream or folding too vigorously. Stop whipping when soft peaks just form—the cream should still look slightly glossy. When combining the blackberry mixture with cream, fold gently with a spatula using sweeping motions, just until no streaks remain. Overworking deflates the air bubbles essential for that light, airy texture.
- → Can I make these gluten-free?
-
Absolutely. Substitute the all-purpose flour with a high-quality gluten-free flour blend designed for baking, ideally one containing xanthan gum for structure. The sponge will have slightly different texture but still provides the necessary base for the mousse. All other components—berries, cream, gelatin—are naturally gluten-free.
- → My glaze didn't achieve a mirror finish. What went wrong?
-
A perfect mirror glaze requires temperature control. The glaze should be cooled until slightly thickened but still pourable—around 85-90°F (29-32°C). If too warm, it runs off too thinly. If too cool, it becomes uneven. Straining the puree through a fine mesh sieve before adding gelatin also ensures absolute smoothness and professional-looking results.