 Pin it
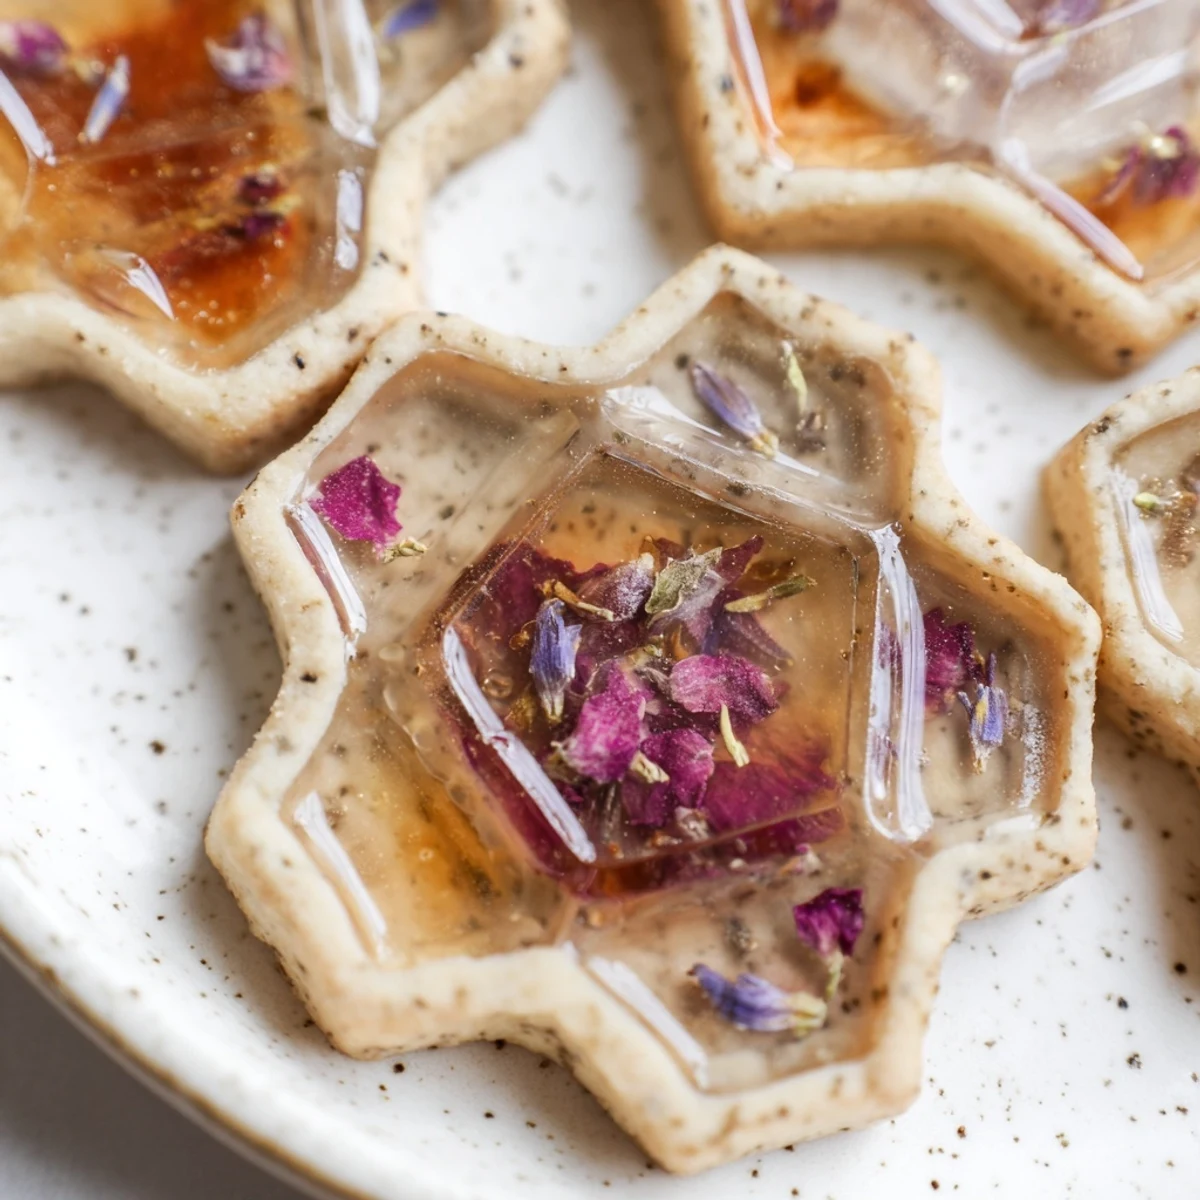
 These enchanting cookies combine the sophisticated flavor of Earl Grey tea with a whimsical stained glass effect created by melted vegan candies and edible flowers. The result is a stunning treat that captures light beautifully, making them perfect for tea parties, weddings, or special occasions.
The cookie dough itself is subtly fragrant from finely ground tea leaves, creating a tender shortbread-style base. When baked, the crushed hard candy centers melt into transparent, jewel-toned windows that hold delicate edible flowers suspended inside.
Best served fresh, these cookies become conversation starters at any gathering. The process is simple yet impressive—roll, cut, fill with candy, and watch the magic happen in the oven.
The afternoon sun hit my kitchen windowsill just right when I first tried making stained glass cookies, creating this magical moment where the crushed candy centers actually glowed like tiny cathedral windows. I was experimenting with Earl Grey tea from a local bakery recommendation, and something about the bergamot notes mingling with the floral candy centers felt unexpectedly sophisticated yet playful. My roommate walked in, saw the trays cooling, and immediately asked if they were from some fancy European pastry shop instead of our tiny apartment kitchen.
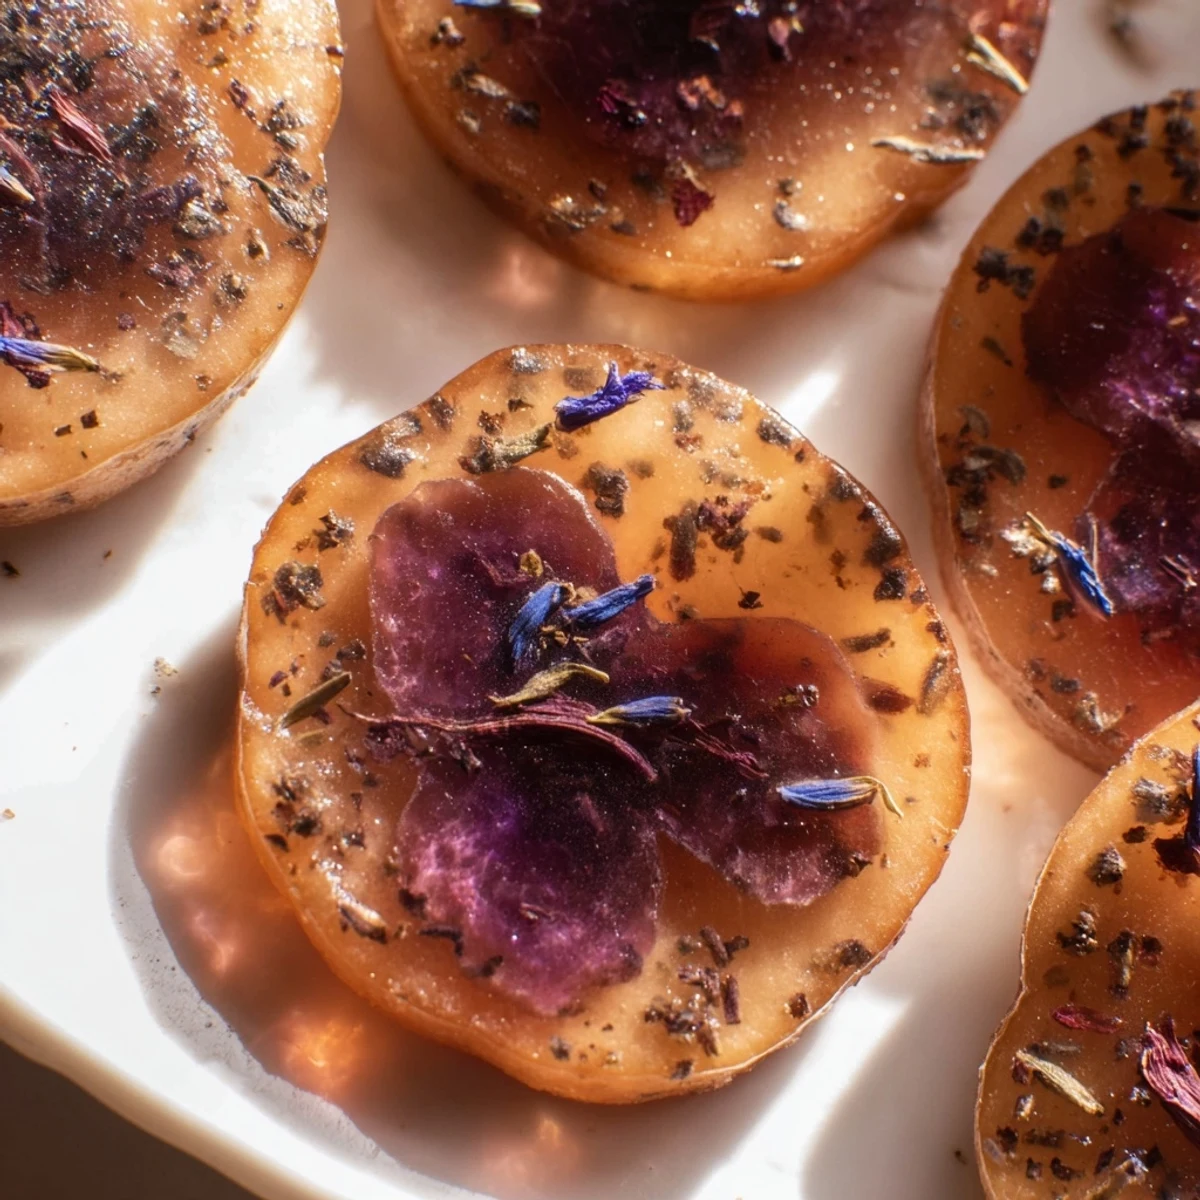
Last spring I made a batch for my mothers birthday and she literally held one up to the sunlight, examining the way the purple candy caught the light with dried rose petals suspended inside. She then proceeded to tell everyone at her party about them with such pride that I ended up sharing the recipe with three of her friends before the dessert course even ended.
Ingredients
- 1 3/4 cups (210 g) gluten-free all-purpose flour blend: This creates the structure without the wheat, and I have found that a blend with xanthan gum holds the cutout shapes best
- 1/3 cup (40 g) almond flour: Adds subtle nutty richness and helps create that tender shortbread texture that melts in your mouth
- 2 Earl Grey tea bags or 2 tsp loose leaf tea: Finely grinding the tea leaves releases the bergamot oil, infusing the whole dough with that distinctive floral citrus aroma
- 1/2 tsp baking powder: Just enough lift to keep these from becoming too dense while still maintaining that delicate crispness
- 1/4 tsp fine sea salt: Balances the sweet candy centers and enhances the tea flavor
- 1/2 cup (100 g) organic granulated sugar: Sweetens without overpowering the delicate Earl Grey notes
- 1/2 cup (120 g) vegan butter, softened: Creates that rich tender crumb, and coconut oil works but gives a slightly different texture
- 2 tbsp unsweetened plant milk: Brings the dough together without adding sweetness
- 1 tbsp maple syrup: Adds a depth of flavor that enhances the floral notes beautifully
- 1 tsp pure vanilla extract: Rounds out all the flavors and adds warmth
- 1/2 cup vegan hard candies: Jolly Ranchers work well, but I have found that crushing them creates more even melting than using whole pieces
- Edible dried flowers (rose petals, cornflower, violets, lavender): Only use flowers specifically labeled as edible, usually found in specialty grocery stores or ordered online
Instructions
- Prepare your baking space:
- Preheat your oven to 350°F (175°C) and line two baking sheets with parchment paper. The parchment is crucial because any candy that oozes will stick to bare metal.
- Infuse the tea:
- Open those Earl Grey tea bags and grind the contents into a fine powder using a mortar and pestle or spice grinder. The finer the grind, the more evenly the flavor distributes throughout your dough.
- Whisk the dry ingredients:
- In a medium bowl, combine your gluten-free flour blend, almond flour, that fragrant ground Earl Grey, baking powder, and salt. Give it a thorough whisking to ensure everything is evenly distributed.
- Cream the butter and sugar:
- Beat the softened vegan butter and granulated sugar together until fluffy, about 2 to 3 minutes. The mixture should look lighter in color and feel creamy when you scrape the sides of the bowl.
- Add the wet ingredients:
- Pour in the plant milk, maple syrup, and vanilla extract, mixing until fully incorporated. The mixture might look slightly curdled but will smooth out once the flour is added.
- Combine everything:
- Gradually add your dry ingredients to the wet mixture, stirring gently until a soft dough forms. If the dough feels too sticky to handle, let it chill in the refrigerator for 15 minutes to firm up slightly.
- Roll it out:
- Lightly dust your work surface with gluten-free flour and roll the dough to about 1/4 inch (6 mm) thickness. I find working with half the dough at a time prevents it from getting too warm.
- Create the stained glass window:
- Use a large cookie cutter for the outer shape, then press a smaller cutter in the absolute center to create that window opening. Carefully transfer the cut cookies to your prepared trays, leaving about an inch between them.
- Fill with candy:
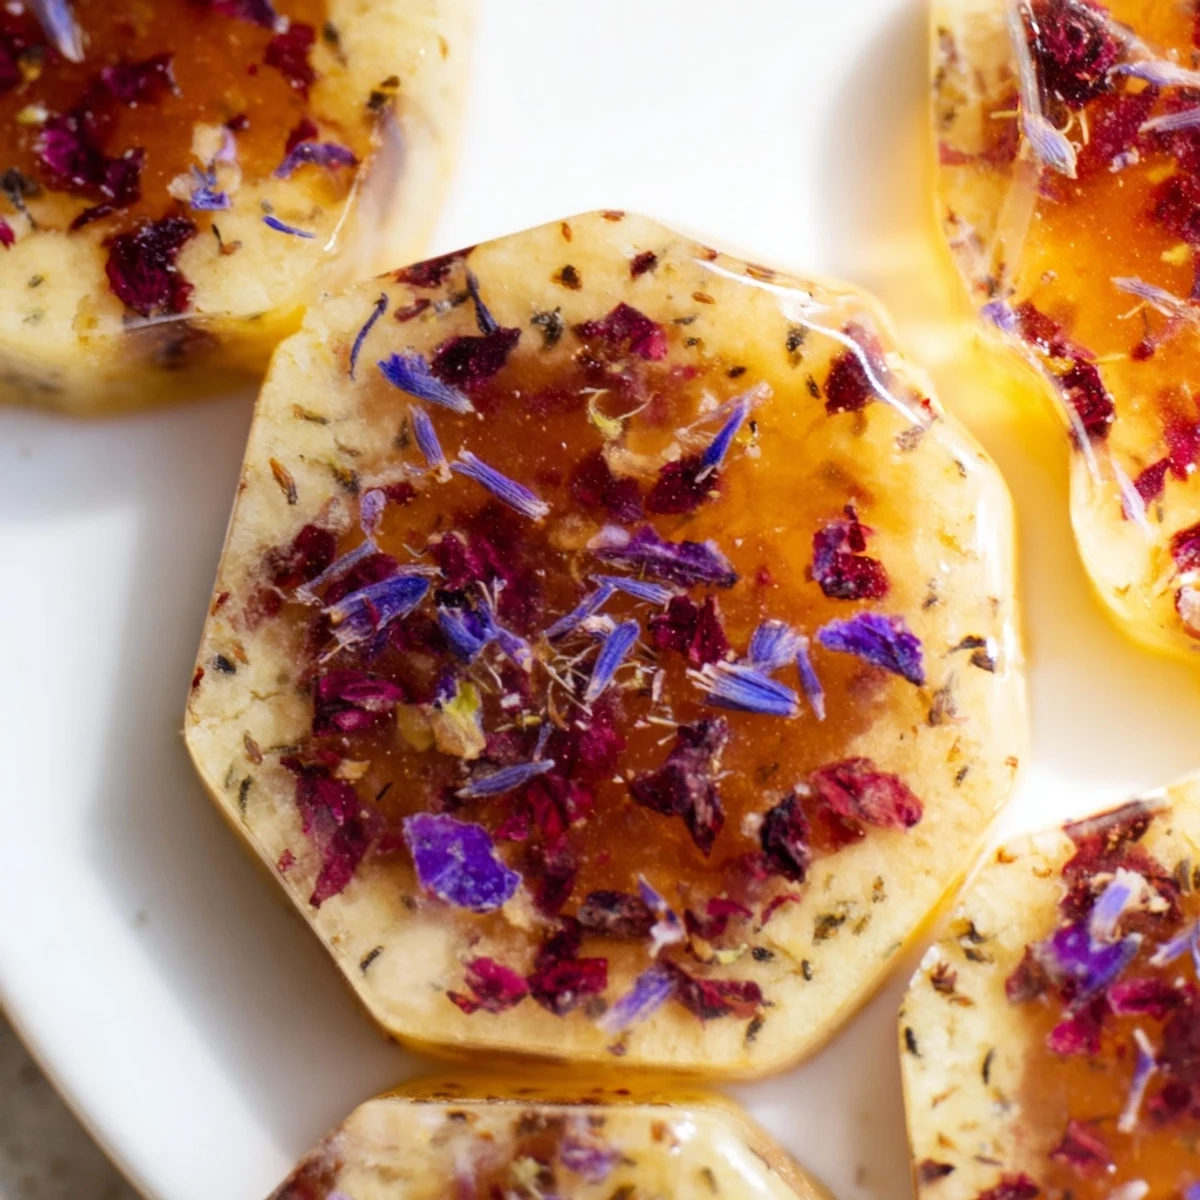
- Spoon 1 to 2 teaspoons of crushed vegan candy into each cutout center, being careful not to overfill. Gently press a few edible flowers into the candy, and they will adhere as everything melts together.
- Bake to perfection:
- Bake for 9 to 11 minutes, watching for edges that turn just barely golden. The candy centers should be completely melted and bubbling slightly, but avoid overbaking or the candy may become too dark.
- Cool completely:
- Let the cookies cool fully on the baking sheet before attempting to move them. The stained glass centers need time to harden again, otherwise they will crack and lose that beautiful translucent effect.
 Pin it
 My niece asked if she could hang them on her Christmas tree after seeing them held up to the light, and I had to explain gently that they were meant to be eaten not displayed. We ate them together instead, watching the way the candy centers caught the afternoon sun through the kitchen window.
Working with Edible Flowers
I learned the hard way that not all pretty flowers are food safe, so always purchase from sources that specifically label them as edible. The flowers preserve beautifully when suspended in the candy, creating these tiny preserved moments that look almost too pretty to eat.
Getting the Candy Texture Right
Crushing the candies into smaller pieces helps them melt more evenly, creating that smooth stained glass effect without cloudy patches. I use a rolling pin over the candies while they are still in their sealed bag to prevent making a mess on my counter.
Storing Your Masterpieces
These cookies keep their beautiful stained glass effect best when stored in an airtight container with parchment paper between layers. Humidity is the enemy, so avoid storing them anywhere moist or the candy centers might become sticky and lose that gorgeous clarity.
- Layer them between wax paper to prevent the candy centers from sticking to each other
- They stay fresh for up to 4 days, though the flowers may start to fade slightly in color
- For gifting, pack them in a single layer in a box with a tight-fitting lid to protect those delicate centers
 Pin it
 These Earl Grey stained glass cookies have become my go-to whenever I need something that feels special without requiring hours of work. There is something genuinely magical about holding one up to the light and seeing the world filtered through that tiny candied window.
Recipe Q&A
- → What candies work best for the stained glass effect?
-
Clear or translucent hard candies like Jolly Ranchers, Life Savers, or crushed lollipops create the most beautiful stained glass effect. Avoid opaque candies as they won't allow light to shine through.
- → Can I use fresh flowers instead of dried?
-
Fresh flowers contain moisture that may cause issues during baking. Always use certified edible dried flowers for the best results and safe consumption.
- → How do I prevent the candy from overflowing?
-
Fill only about 1-2 teaspoons of crushed candy per cookie center. The candy melts and spreads, so overfilling can cause it to leak onto the baking sheet.
- → Can I make these without gluten-free flour?
-
Yes, simply substitute the gluten-free flour blend with regular all-purpose flour. The ratios remain the same, though texture may vary slightly.
- → How should I store these cookies?
-
Store in an airtight container at room temperature for up to 4 days. Place parchment paper between layers to prevent sticking. Humidity may affect the stained glass centers over time.
- → Can I make the dough ahead of time?
-
Absolutely. Wrap the dough tightly and refrigerate for up to 3 days or freeze for up to 1 month. Thaw overnight in the refrigerator before rolling and cutting.